A Step-by-Step Guide to Install SCCM 2012 R2 with Preparations.
Prepare
Early we make some preparations:
- Install and configure SQL Server 2012 and Reporting Services;
- Install IIS Role;
- Install WSUS Role;
- Extend Active Directory Schema.
También:
- I add 2 disks to my VM (DATA and Updates);
- Place in drive root empty file NO_SMS_ON_DRIVE.SMS (if you don’t wish to place Distribution Point files to it);
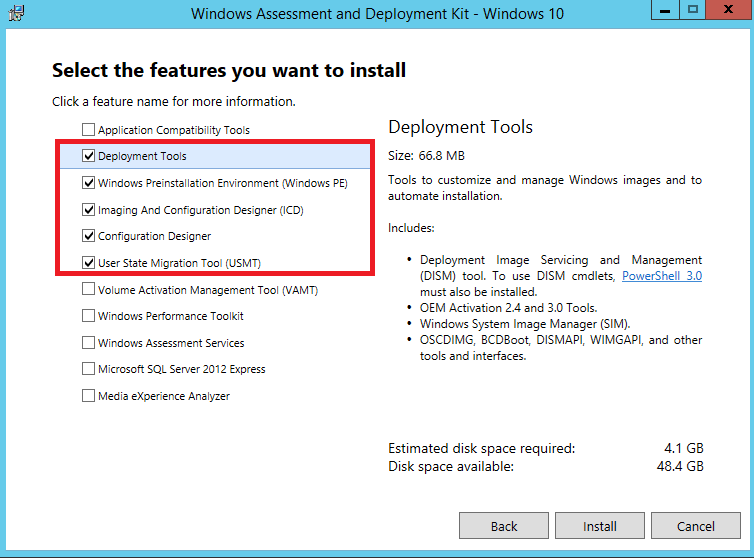
- Install Windows ADK;
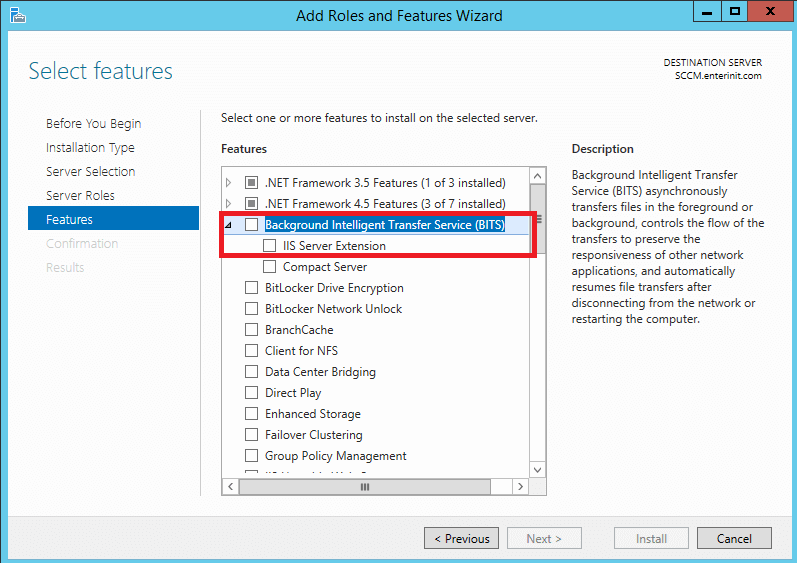
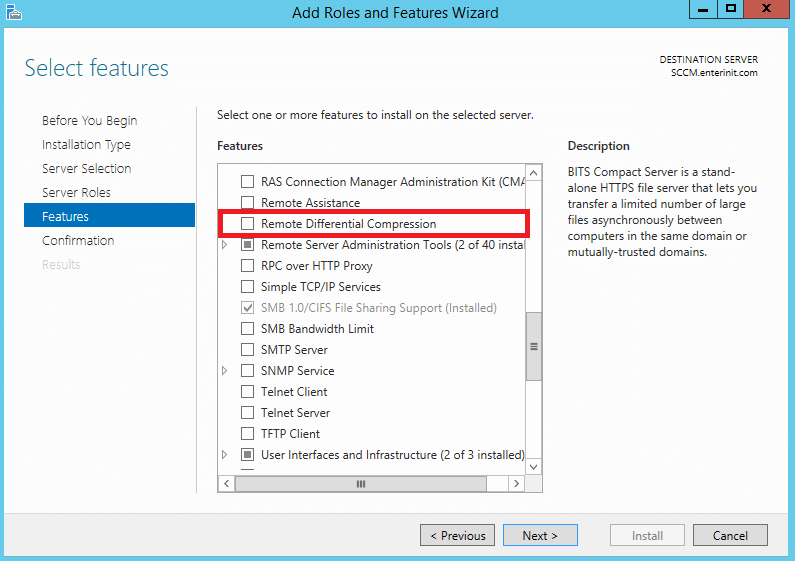
- Add some Windows Server Features;
- Install Report Viewer 2010 (need to open reports);
- Add SCCM computer to Administradores de grupos locales en Servidor SQL;
- Create a service account for SCCM (need for agent and software installation);
- Disable Windows Firewall on SCCM Server;
- A couple of cups of coffee.
Ready, Steady, Go
- Insertar DVD disk or *.ISO with SCCM 2012 archivos de instalación;
2. Run installation;
3. Hacer clic Instalar;
4. Para Before You Begin hacer clic Próximo;
5. Para Getting Started leave by default and click Próximo;
6. Para Product Key insert your license key or choose evaluation and click Próximo;
7. Para Microsoft Software License Terms READ and set checkmark I accept these license terms, hacer clic Próximo;
8. Para Prerequisite Licenses read and set checkmarks, hacer clic Próximo;
9. Para Prerequisite Downloads choose folder and download required files. Hacer clic Próximo;
10. Downloading begin;
11. Para Server Language Selection choose language and click Próximo;
12. Para Client Language Selection choose language and click Próximo;
13. Para Site and Installation Settings ingresar código del sitio y Site Name, hacer clic Próximo;
14. Para Primary Site Installation leave by default Install the primary site as a stand-alone site (if you don’t have a hierarchy) y haga clic Próximo;
15. In the pop-up window click Sí;
16. Para Database Information ingresar Nombre del servidor SQL (FQDN), Nombre de instancia y Database Name. Hacer clic Próximo;
17. Hacer clic Próximo;
18. Para SMS Provider Settings hacer clic Próximo;
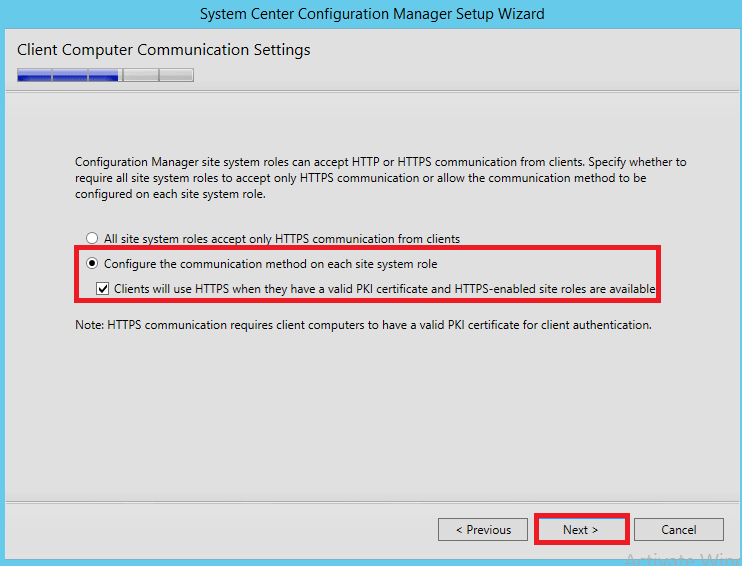
19. If you have PKI infrastructure choose All site system…, if not – see screenshot. Hacer clic Próximo;
20. In the pop-up window click Sí;
21. Para Site System Roles set protocols to Http y haga clic Próximo;
22. Para the Customer Experience Improvement Program choose the option that you like and click Próximo;
23. Para Settings Summary hacer clic Próximo;
24. Para Prerequisite Check hacer clic Comenzar la instalación (in my test deployment I don’t set the limit for SQL Server Memory). If you get a warning you may also begin installation;
25. Installation begins, get your coffee, it took some time;
26. When the installation completes, hacer clic Cerca y Reboot your server.

")


