
How to Disable User Account Control (UAC) on Windows: GUI, CMD, PowerShell, and Regedit Methods.
Method 1 (GUI)
The first method is easy – using Control Panel. Open Control Panel and navigate to User accounts;
NOTE: Ensure that you enable Small Icons.
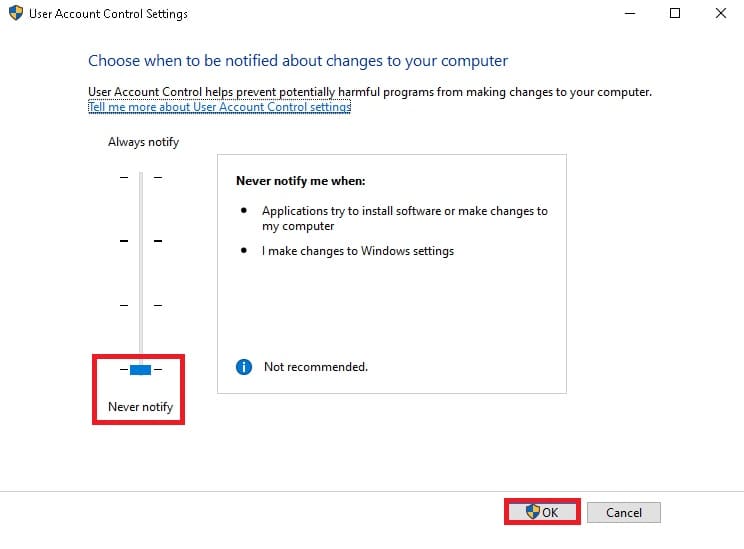
Click on Change User Account Control Settings;
Move the bar to the bottom (Never Notify) and click OK;

Method 2 (CMD & PowerShell)
But if you need to set this configuration on lots of computers, it’s better to use one of these 2 ways:
1 ) Run a CMD script to set a REGISTRY key to disable UAC;
2) Run a PowerShell command to disable UAC;
CMD
REG ADD HKLM\SOFTWARE\Microsoft\Windows\CurrentVersion\Policies\System /v EnableLUA /t REG_DWORD /d 0 /fPowerShell
Set-ItemProperty -Path registry::HKEY_LOCAL_MACHINE\SOFTWARE\Microsoft\Windows\CurrentVersion\Policies\System -Name EnableLUA -Value 0 NOTE: Don’t forget to reboot after running this command.
Method 3 (Regedit)
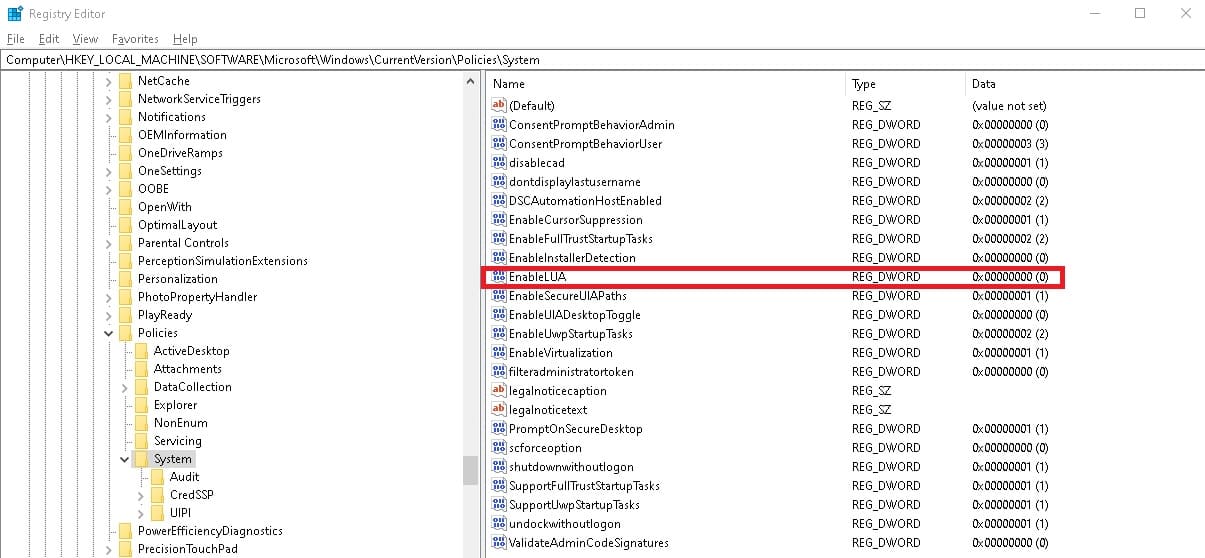
Also, you can change the parameter of the Registry key to disable the UAC manual without receipts. To achieve this change key EnableLUA to 0 using Registry Editor.
Start REGEDIT (using search by pressing WIN+R)
Navigate to (in Windows 10 1803 and higher you can copy and paste this to the Registry Editor path);
Computer\HKEY_LOCAL_MACHINE\SOFTWARE\Microsoft\Windows\CurrentVersion\Policies\SystemAnd change EnableLUA to 0;

NOTE: Don’t forget to reboot after the registry change.