How to Create SQL Server 2016 Firewall Rules using GUI and PowerShell.
With GUI:
- Start the system and log in (with admin rights user);
2. Open 제어판. 클릭하세요 Windows Firewall;
3. After that click on Advanced Settings;
4. Windows Firewall console open. If you click on Properties (right side) – you can disable firewalls for all networks. We going to Inbound Rules (left side) for our rule creation;
5. 클릭하세요 New Rule;
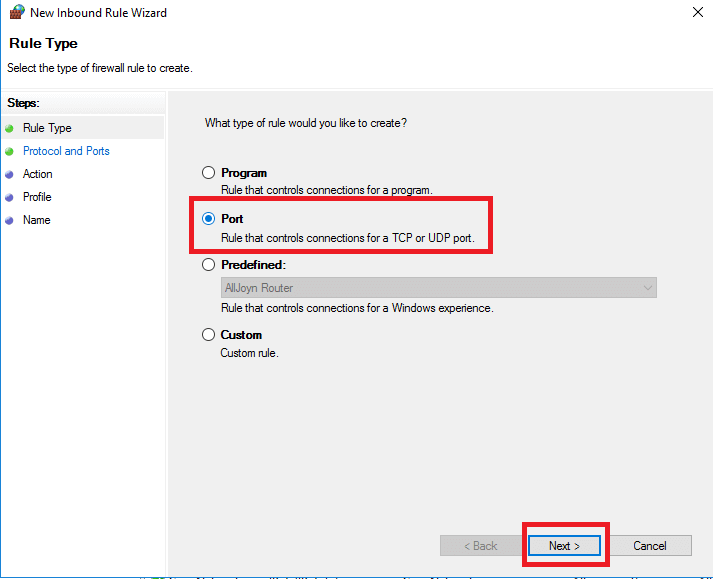
6. Rule creation process begins. 제 경우에는, I create a rule for Inbound TCP ports. 을 위한 Rule Type select option Port 그리고 클릭 Next;
7. 을 위한 Protocol and Ports select option TCP 그리고 Special Local Ports. I use 2 ports for SCCM deployment (8080, 14331) and also added standard SQL TCP ports (1433,1434,4022). After entering ports click Next;

8. 을 위한 Action (in this case leave by default Allow the connection). Click Next;

9. 을 위한 Profile, leave by default, click Next;

10. Enter a name for your rule (for example SQL TCP Ports), so you can easily find it in the future. Click Finish;
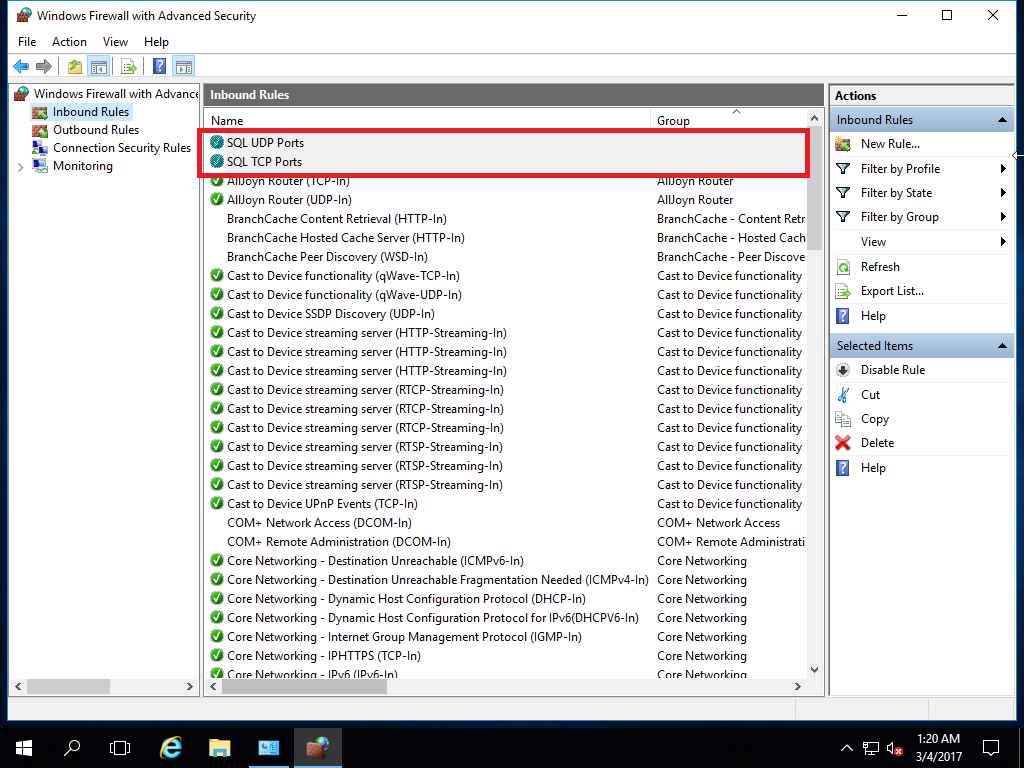
11. In the last screenshot, you see two rules, which I created for SQL Server. One for TCP ports and one for UPD port (1434).
With PowerShell:
- Run PowerShell as Administrator;
2. Enter text and press Enter:
New-NetFirewallRule -DisplayName "SQL TCP Ports" -Direction Inbound –Protocol TCP –LocalPort 8080, 1433, 1434, 4022, 14331 -Action allowSome explanations:
-DisplayName “SQL TCP Ports” – Rule Name;
-Direction Inbound – Rule direction;
–Protocol TCP – Protocol (TCP or UDP);
–LocalPort – Your ports;
-Action allow – Allow or Disallow.


")


