이 사이트를 이용함으로써, 당신은 다음에 동의합니다 개인 정보 보호 정책.
수용하다
엔터인IT엔터인IT엔터인IT
  • 집
  • IT 프로
  • 기술
  • 마이크로 소프트
    • 하늘빛
    • 구성 관리자/SCCM
    • DPM
    • 오케스트레이터
    • Hyper-V
    • 마이크로소프트 엣지 인사이더
    • MSI
    • 사무실 365
    • 사무실 내부자
    • 파워 BI
    • 스카이프
    • SQL 서버
    • 팀
  • 창
    • Windows 관리 센터
    • 윈도우 클라이언트
    • 윈도우 서버
  • SCCM 쿼리 컬렉션 목록
독서: Step-by-Step Guide to Install Windows Server 2016 on Physical or Virtual Machine
글꼴 크기 조정기아아
엔터인IT엔터인IT
글꼴 크기 조정기아아
  • 집
  • IT 프로
  • 기술
  • 마이크로 소프트
  • 창
  • SCCM 쿼리 컬렉션 목록
찾다
  • 집
  • IT 프로
  • 기술
  • 마이크로 소프트
    • 하늘빛
    • 구성 관리자/SCCM
    • DPM
    • 오케스트레이터
    • Hyper-V
    • 마이크로소프트 엣지 인사이더
    • MSI
    • 사무실 365
    • 사무실 내부자
    • 파워 BI
    • 스카이프
    • SQL 서버
    • 팀
  • 창
    • Windows 관리 센터
    • 윈도우 클라이언트
    • 윈도우 서버
  • SCCM 쿼리 컬렉션 목록
윈도우 서버

Step-by-Step Guide to Install Windows Server 2016 on Physical or Virtual Machine

게시: 2월 11, 2024
2 최소 읽기
공유하다

Step-by-Step Guide to Install Windows Server 2016 on Physical or Virtual Machine.

1. Download Windows Server *.iso and burn it to DVD or Flash (or external HDD, yeah it’s work)!

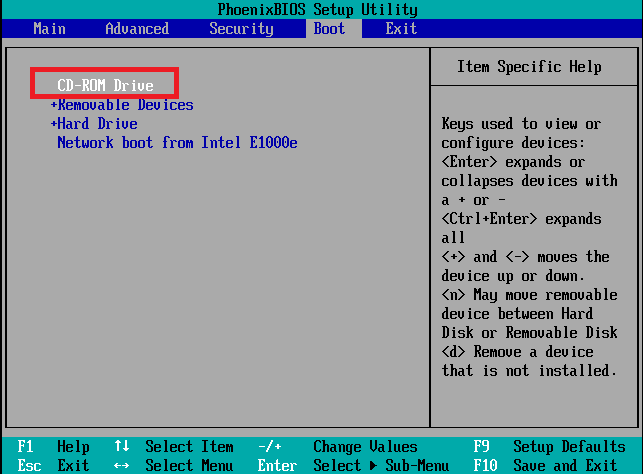
2. Start up your machine, go to BIOS (F2 or Del on your keyboard). Carefully config all options for the best productivity of your machine. When you config all options, go to BOOT section and set your device with Windows Server as First Boot;

3. Find options like Exit Saving Changes or press F10 button and choose “Yes”;

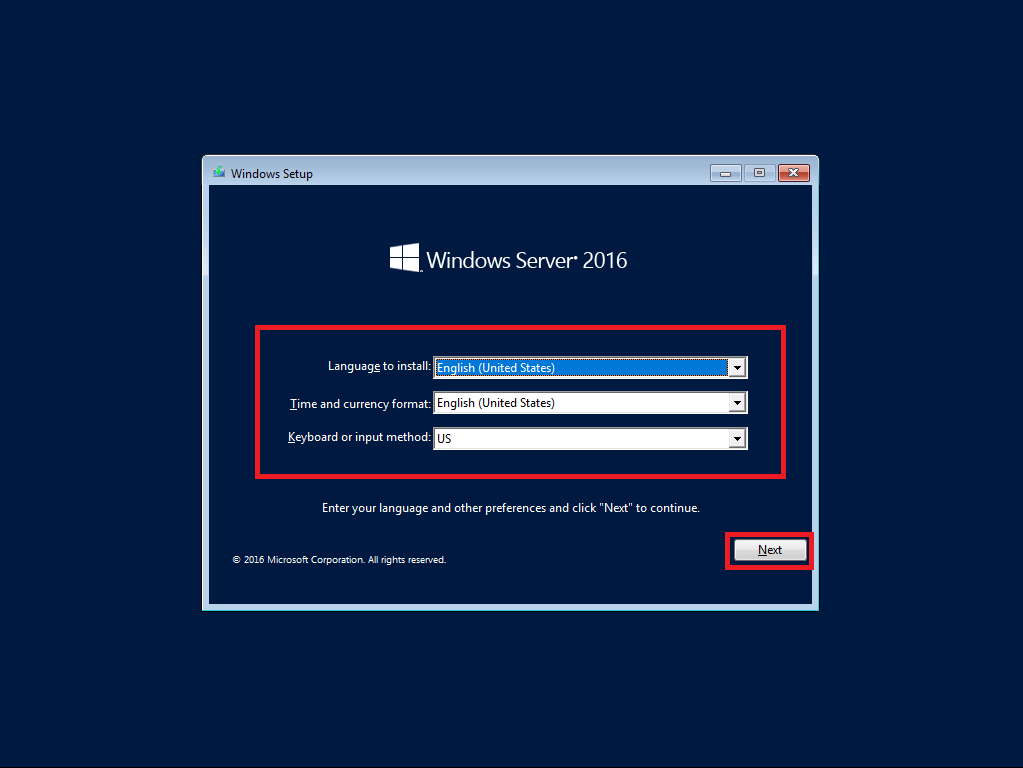
4. After reboot machine will show you next;

5. Config all options, as you need, 그리고 클릭 Next button;

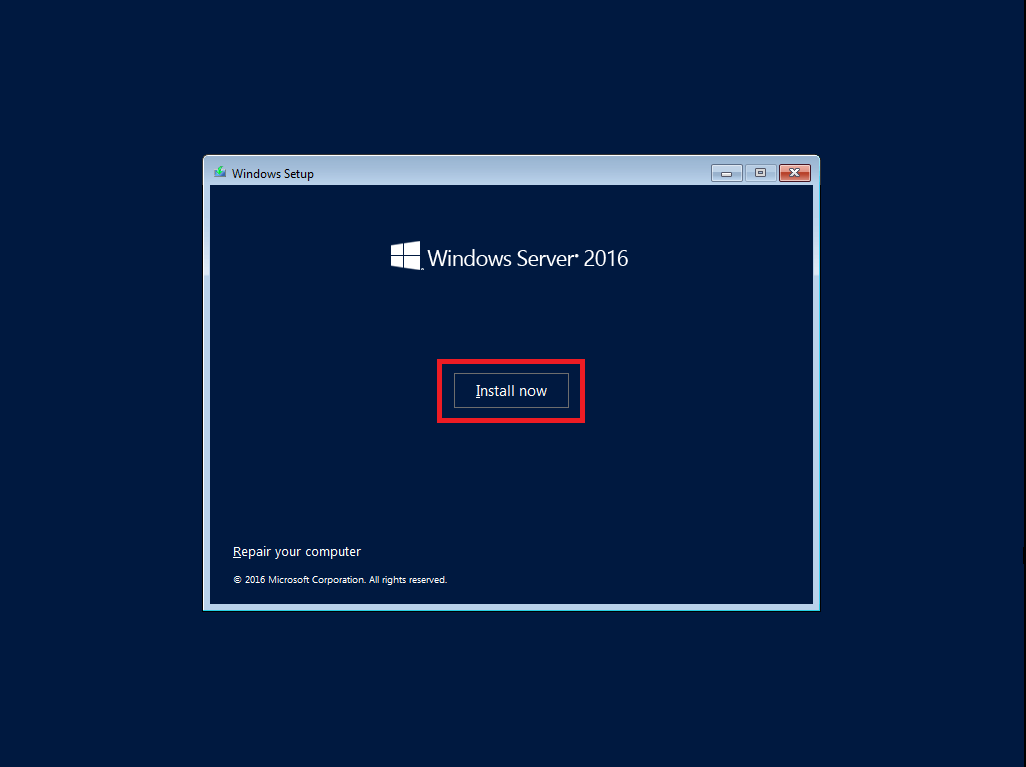
6. In the next screen click Install now button;

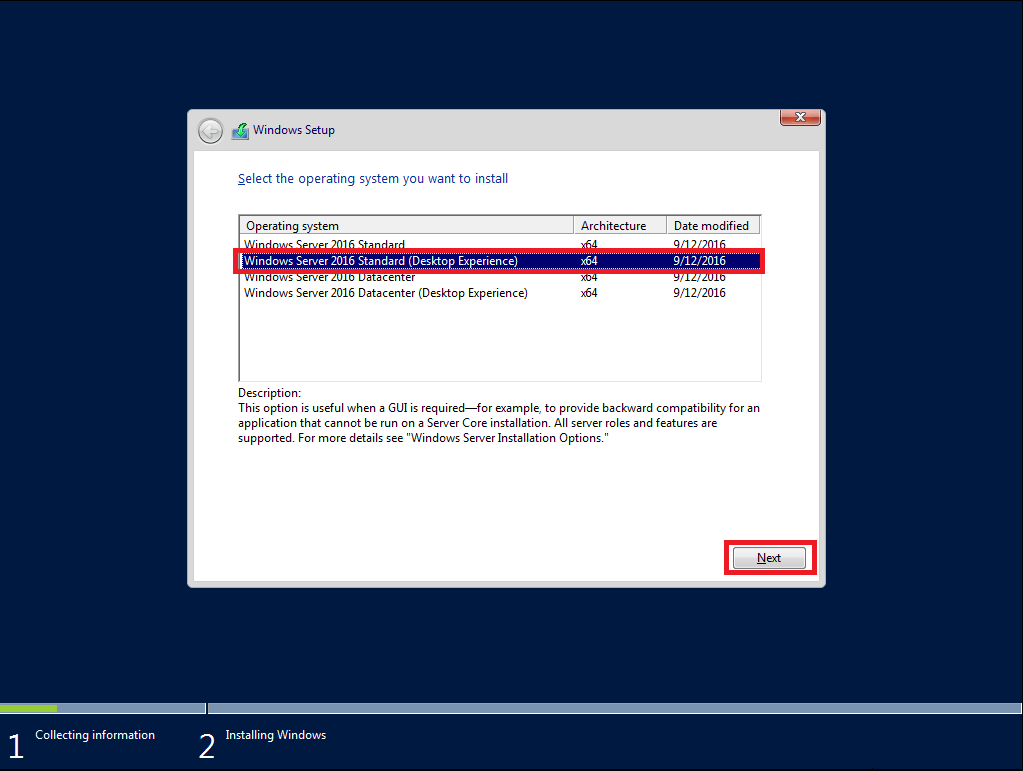
7. As next step you must select the needed version and click Next button;

You may choose next versions from one distributive: Standard or Datacenter (in core or with GUI both);

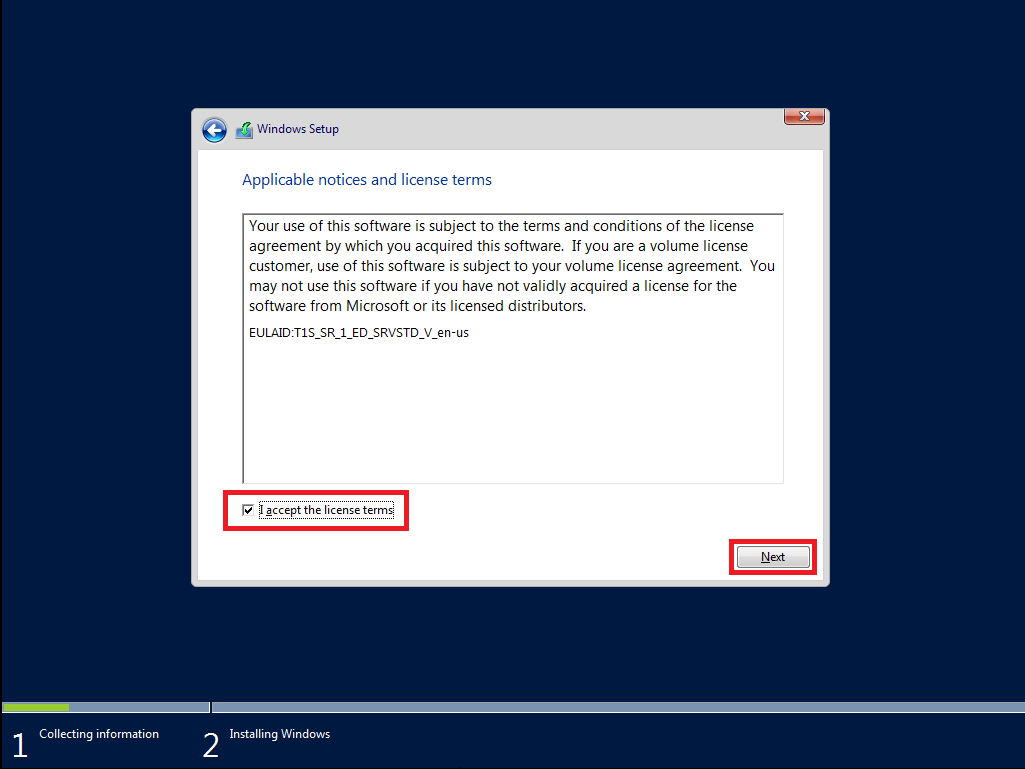
8. At next screen accept license terms and click Next button;

9. We make clean install, so we choose second option Custom: Install Windows only (advanced);

10. Select Drive for installation and click Next button;

If you use an old RAID adapter and don’t see any drives – download drives for it, place on a flash disk and insert. Next, click Load driver and choose the right folder.

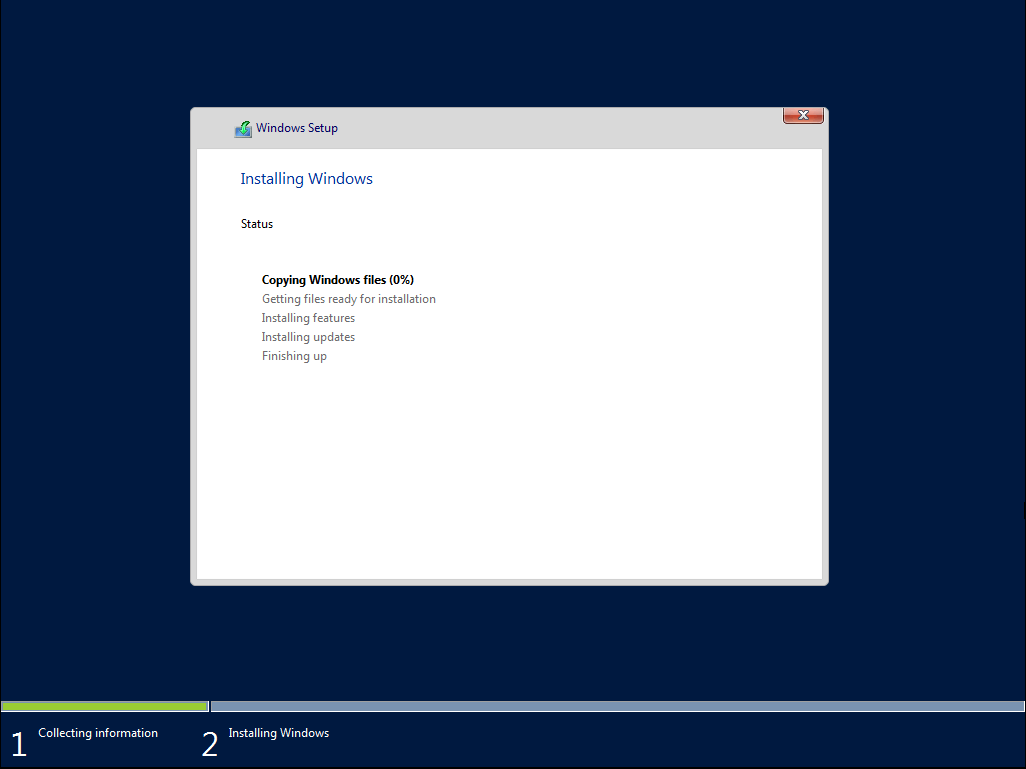
11. Installation starts;

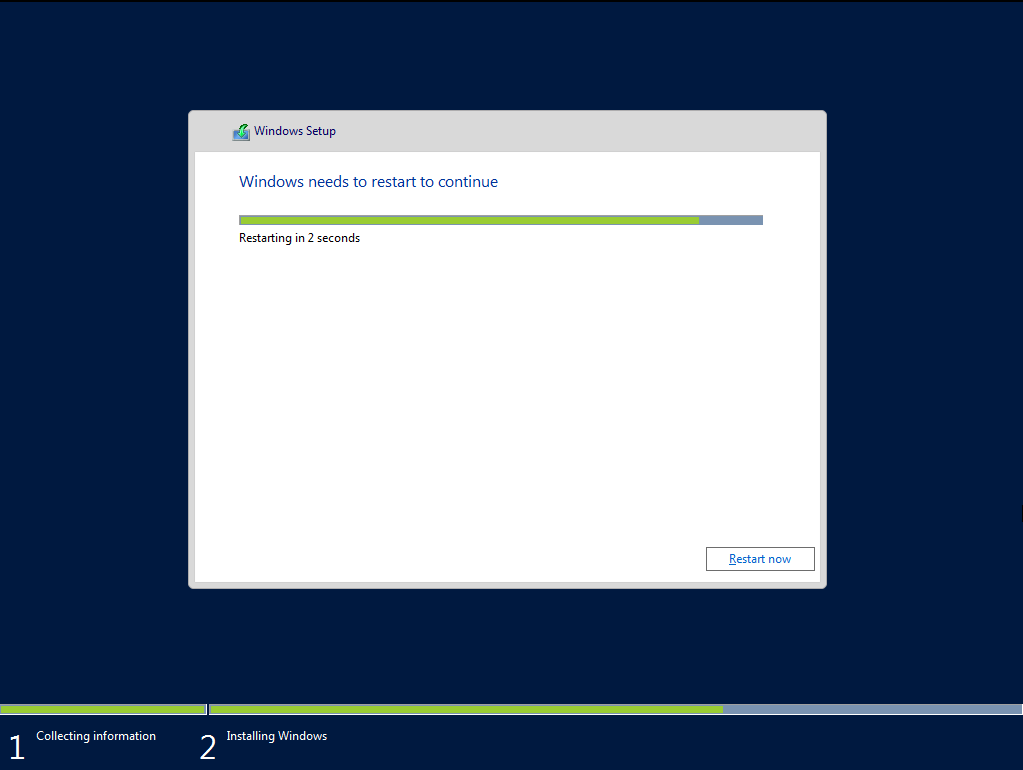
12. When finished – system restart;

13. You may see this message, don’t touch anything and wait;

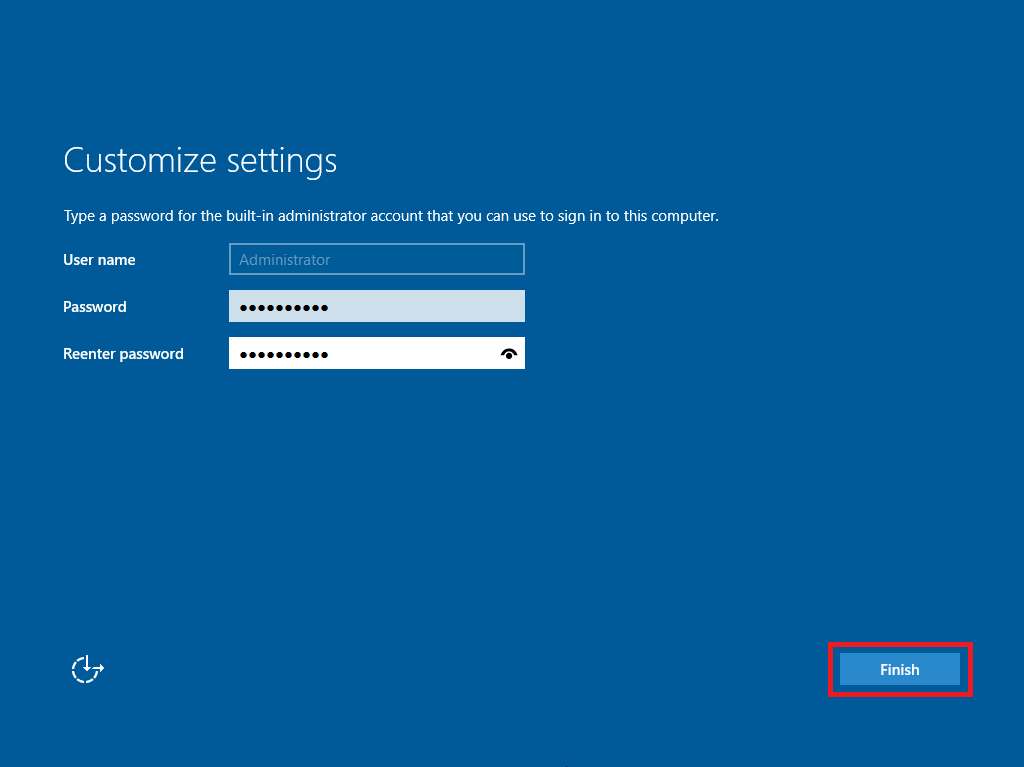
14. Enter password (STRONG PASSWORD) 그리고 클릭 Finish button;

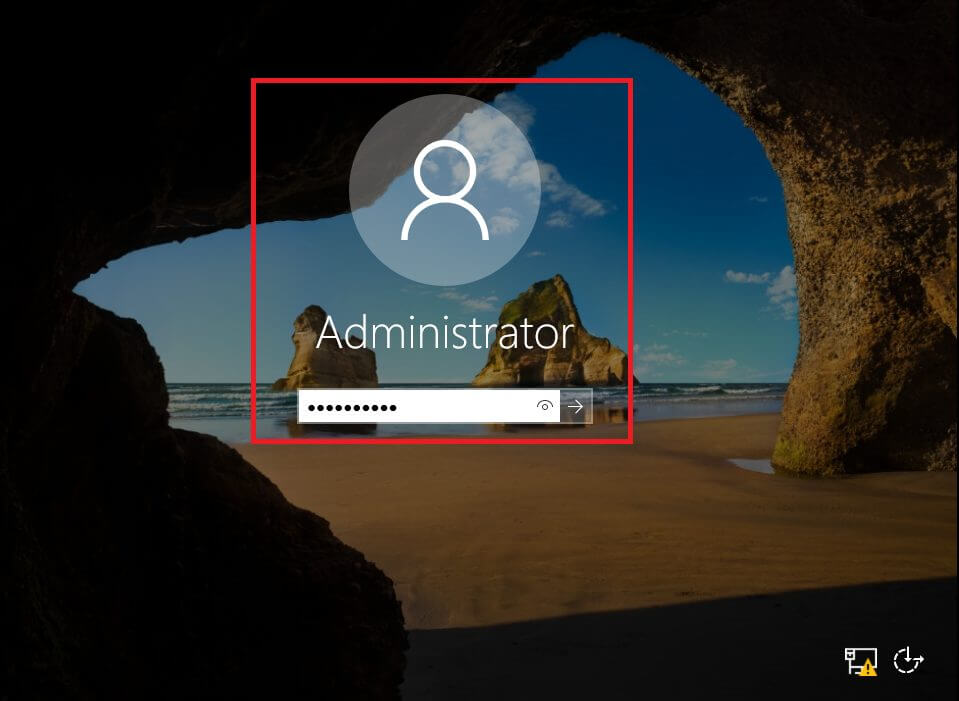
15. Press CTRL+ALT+DELETE (mouse click or keyboard don’t work);

16. Enter your password and login-in;

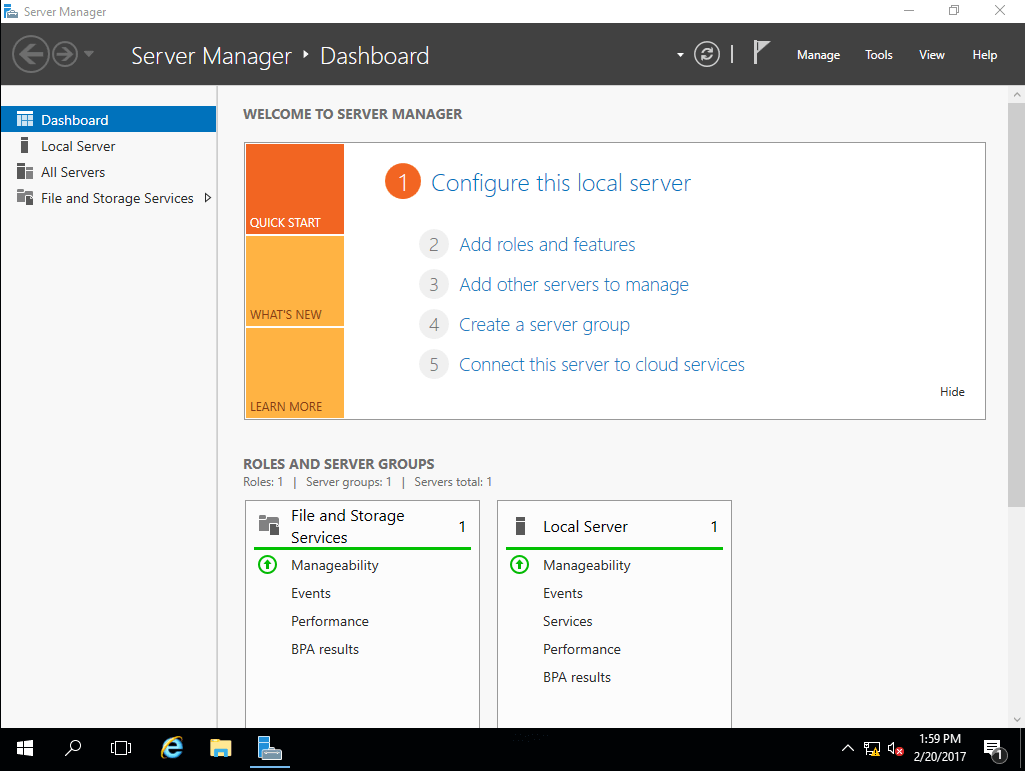
17. The system is installed!

18. Don’t forget reboot, go to BIOS and change back Hard Drive as first boot.

태그됨:Microsoft Windows 서버창윈도우 서버 2016
이전 기사 Enabling Pre-Release Features in SCCM: A Step-by-Step Guide
다음 기사 How to Install and Configure Active Directory on Windows Server 2012 R2
코멘트를 남겨주세요 코멘트를 남겨주세요

답장을 남겨주세요 답장 취소

귀하의 이메일 주소는 공개되지 않습니다. 필수 입력란이 표시되어 있습니다 *

이 사이트는 스팸을 줄이기 위해 Akismet을 사용합니다.. 댓글 데이터가 처리되는 방법 알아보기.

번역

English中文(简体)DanskNederlandsFrançaisDeutschItaliano한국어PolskiPortuguêsRomânăEspañolУкраїнська
~에 의해 Transposh - translation plugin for wordpress

인기 게시물

Windows Server의 시스템 요구 사항 2016
윈도우 서버
구성 관리자 쿼리 컬렉션 목록
구성 관리자 쿼리 컬렉션 목록
configmgr
클래식 팀 사이트의 최신 페이지에서 구조적/관리형 탐색 활성화
기술
SCCM이 DP 위치를 MP에서 예상 버전으로 가져오지 못했습니다.
configmgr

최근 게시물

Ubuntu에서 SSH 보호를 위한 Fail2ban 설치 및 구성 24.04
리눅스
AlmaLinux에서 FirewallD 활성화 및 구성
리눅스
AlmaLinux에서 사용자 생성 및 SSH 키 설정
리눅스
AlmaLinux에서 비밀번호를 재설정하는 방법
리눅스

© 2023 엔터인IT

모바일 버전으로 이동하십시오
돌아온 것을 환영합니다!

귀하의 계정에 로그인하세요

사용자 이름 또는 이메일 주소
비밀번호

비밀번호를 잃어버렸습니다?