Guide to Install SQL Server 2012 for SCCM 2012 R2 | Step-by-Step Tutorial. We will be installing SQL server 2012 Standard edition x64 with the latest updates.
Some Preparation:
- Install .Net 3.5 feature;
- Create rules in Windows Firewall for SCCM connection (I use static port 14331 for DB and 8080 for reporting, also, I added standard TCP and UDP SQL Server ports);
- Create an Active Directory 3 service accounts:
sqlsccmagent – sql agent
sqlsccmsvc – sql service
sqlsccmrep – sql reporting services
- Add all 3 accounts to Local Group Administrators on my SQL Server machine;
- Também, I create (adicionar) two disks (1 for SCCM DATA DBs e 1 for Temp DBs);
Instalação:
- Mount *iso or insert DVD with SQL Server installation files. Go to the folder and run the setup.exe com Run as administrator;
2. Selecione Instalação e clique em New SQL server standalone installation or add features to an existing installation;

3. Uma vez o Setup support rules check run and are verified you may see details by clicking on the button Show Details or click OK to continue the installation;
4. After that SQL checks for updates. Clique Próximo when complete;
5. At the next step SQL Install Setup Files.
6. Para Setup Support Rules you may see a Warning em Firewall do Windows, it’s normal, clique Próximo;
7. Para Product Key enter your product key and click Próximo;
8. Para License Terms read and accept (by settings check mark I accept the license terms) the license terms, also you may set a check mark to Send feature data to Microsoft, clique Próximo;
9. Para Setup Role leave the default option SQL Server Feature Installation e clique Próximo;
10. Para Feature Selection selecione Database Engine Services (with Full-text if you wish), Reporting Services – Native, e Management Tools – Complete. Clique Próximo;

11. Para Installation rules you may see details by pressing Show details and clicking Próximo;
- Choose the option Named Instance and enter its name (In my case SCCM). Também, I change the Instance root directory. Clique Próximo;
13. Para Disk Space Requirements check if it ok and click Próximo;
14. Para Server Configuration em the Service Accounts tab enter early created accounts. Para Collation selecione SQL_Latin1_General_CP1_CI_AS. Clique Próximo;
15. Para Database Engine Configuration em the Server Configuration tab add SQL Server administrators (eu uso local group administrators and my current user);
16. Em Data Directories select the new path and click Próximo;
17. Para Reporting Services Configuration choose to Install only (we configure it later) e clique Próximo;
18. Para Error Reporting set a check mark (if you wish) e clique Próximo;
19. Para Installation Configuration Rules check details and click Próximo;
20. Para Ready to Install if all is OK click Instalar;
21. Installation begins;
22. When the installation is complete click Close and reboot the system;
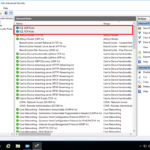
23. After reboot check installed SQL Server 2012;

")


