Step-by-Step Guide to Installing IIS Role on Windows Server 2012 R2.
1. When Server Manager starts, click Add roles and features;
2. For Before You Begin you may set a checkmark at Skip this page by default. Click Next;
3. For Installation Type leave by default Role-based or feature-based installation and click Next;
4. For Server Selection Select your server and click Next;
5. For Server Roles select Web Server (IIS);
6. In the pop-up window click Add features;
7. Click Next;
8. For Features select .NET Framework 3.5 Features;
9. For Web Server Role (IIS) click Next;
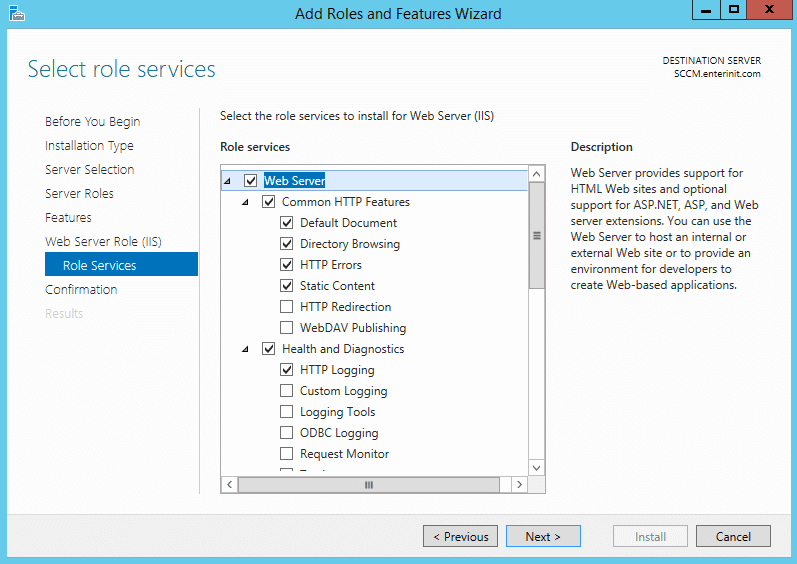
10. For Role Services select options like on screenshots. When the pop-up appears click Add-Features, also enable IIS 6 WMI Compatibility;


11. Click Next;
12. For Confirmation click Install;
13. Installation begins;
14. When complete click Close;
15. IIS role installed;


