Configuration Manager Deploy Google Chrome. Before we begin, download Google Chrome MSI, and copy MSI to a folder, where you place content for Configuration Manager deployments.
Google Chrome is a popular web browser developed by Google. It was first released in 2008 and is currently available for Windows, macOS, Linux, iOS, and Android operating systems.
Google Chrome is known for its speed, simplicity, and user-friendly interface. It supports a wide range of web technologies, including HTML, CSS, JavaScript, and WebGL, which allows it to handle complex web applications and graphics with ease. Chrome also features built-in tools such as a task manager, a download manager, and a bookmark manager.
One of Chrome’s most notable features is its integration with Google services, such as Gmail, Google Drive, and Google Translate. Users can also customize Chrome with a variety of extensions, which can add new functionality and enhance their browsing experience.
However, Chrome has faced criticism for its heavy resource usage, which can slow down older or lower-end computers, and for its data collection practices, which some users may find intrusive. Additionally, its dominance in the browser market has raised concerns about Google’s control over the web and potential antitrust issues.
Create Configuration Manager application
1. Start the Configuration Manager console and navigate to Software Library\Application Management\Applications. Click Create Application;
2. Select Manually specify the application information and click Next;
3. Fill in the fields and click Next;
4. Fill in the fields, add Icon;

5. Click Next;
6. For Deployment Types, click Add;
7. At Type select Script Installer, select Manually specify the application information and click Next;
8. Fill in fields and click Next;
9. Select Content-Location. For Installation program use:
msiexec /i "GoogleChromeStandaloneEnterprise64" /qnFor Uninstall program use:
msiexec /x {<your msi ID, see next step>} /qn /norestart10. Click Next;

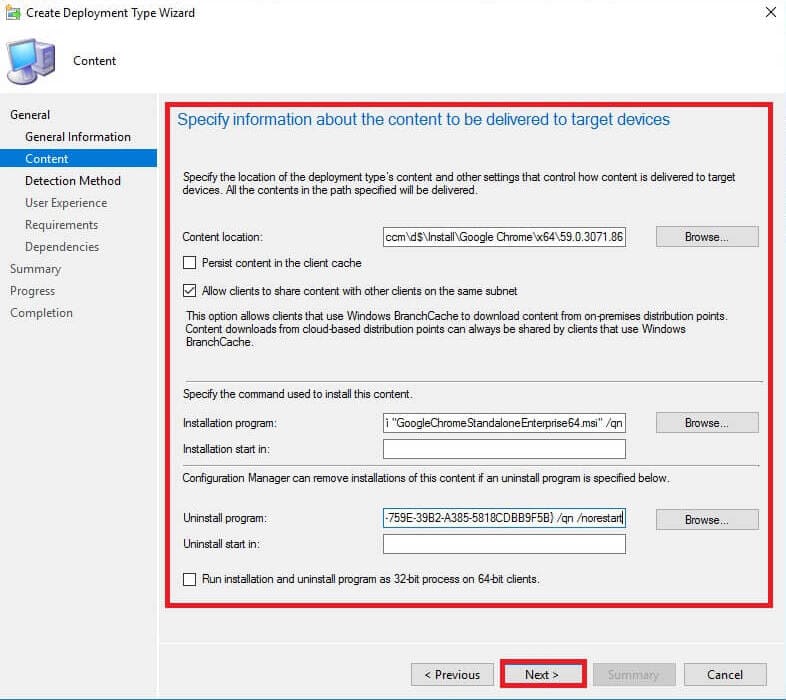
11. Click Add Clause, set Windows Installer, click Browse, and select your MSI package. In the Product code field, you get your MSI ID. Click OK;
12. Click Next;
13. Specify user experience settings for the application and click Summary;
14. Click Next;
15. Click Close;
16. Deployment type added, click Next;
17. Click Next;
18. Click Close;
Distribute Content and Deploy
- Right Mouse Button click on the newly added application and select Distribute Content;
2. Click Next;
3. Click Next;
4. Add Distribution Point and click Next;
5. Click Next;
6. Click Close;
7. Wait some time, refresh the page and you must get Content Status – Success;
8. Right Mouse Button click on the newly added application and select Deploy;
9. Select the target collection and click Next;
10. Click Next (We already sent it to Distribution Point);
11. Specify Deployment Settings and click Next;
12. Specify Scheduling and click Next;
13. Specify User Notifications and click Next;
14. Specify Alerts and click Next;
15. Click Next;
16. Click Close;
We complete the SCCM side, let’s check how it works at the client.
Install Google Chrome from the Software Center
SCCM Software Center, also known as Microsoft Endpoint Configuration Manager Software Center, is a software management tool that is part of the Microsoft Endpoint Configuration Manager (formerly System Center Configuration Manager) suite. It is designed for use in enterprise environments to manage software deployment, updates, and compliance on Windows-based endpoints.
SCCM Software Center provides a centralized location for end-users to manage and install applications, software updates, and operating system upgrades. It allows IT administrators to create custom software packages and deploy them to specific groups of users or devices. Users can then access and install the available software from the Software Center on their computer.
In addition to software installation, SCCM Software Center also provides information about the installed software and updates, as well as notifications about pending software installations and required updates. This helps ensure that all devices are up to date and compliant with the organization’s software policies.
Overall, SCCM Software Center is a powerful tool that simplifies the software management process for both IT administrators and end-users in large enterprise environments.
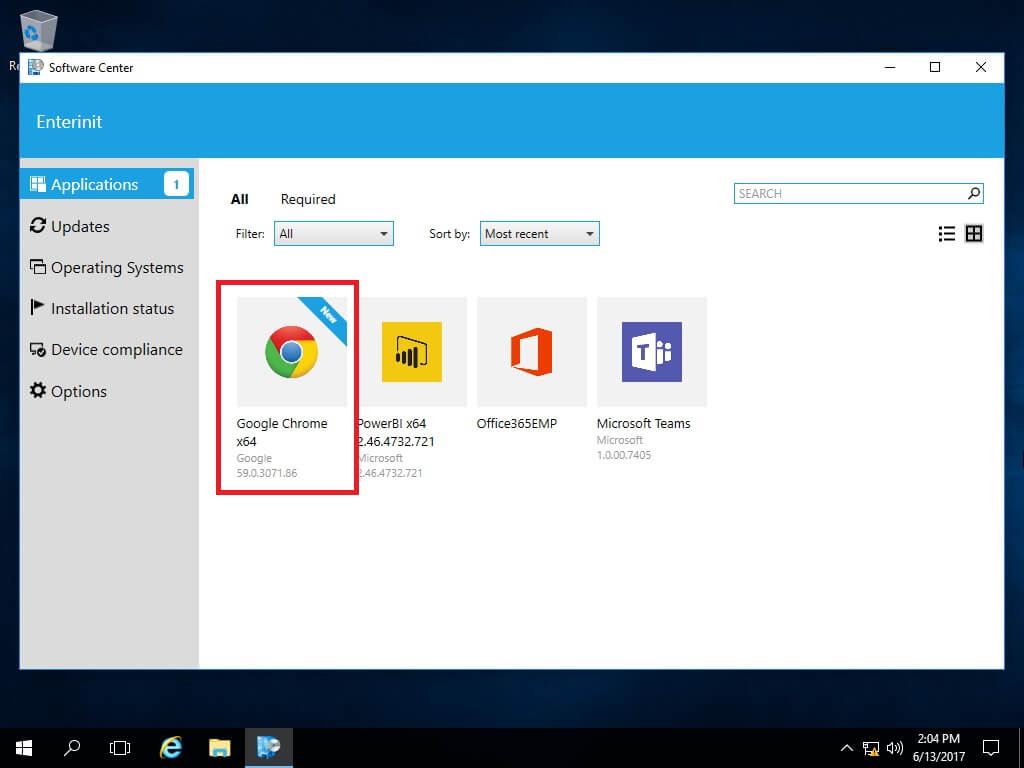
1. Log into the client and start Software Center. You must see a new application;
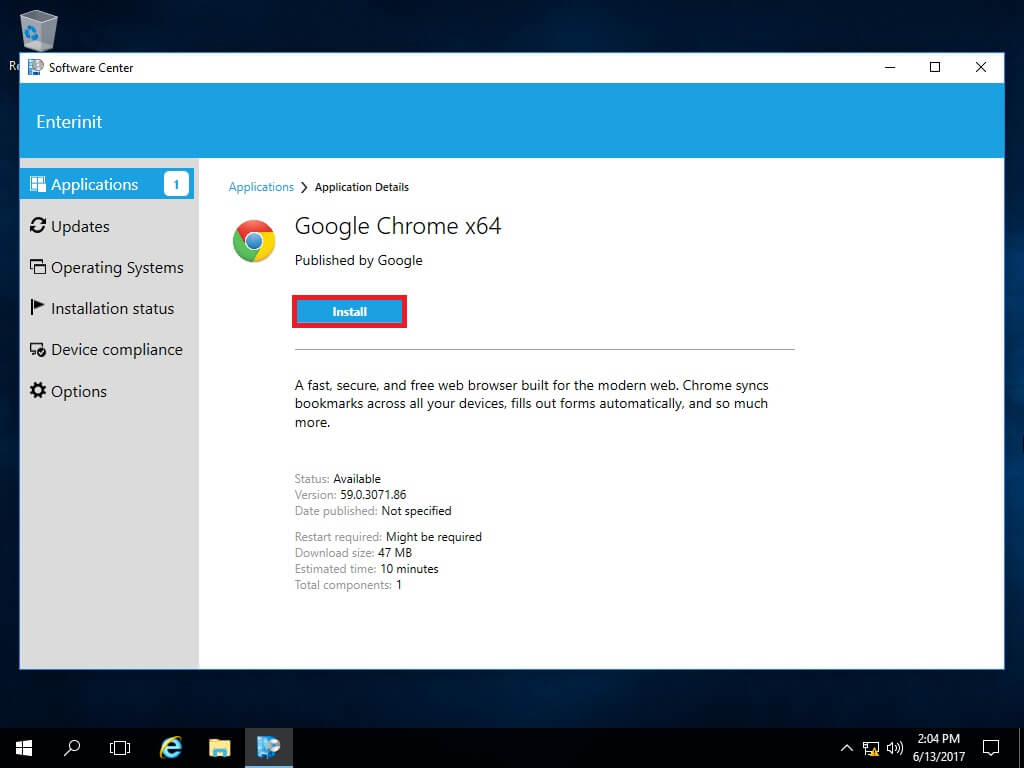
2. Click Install and wait some time;
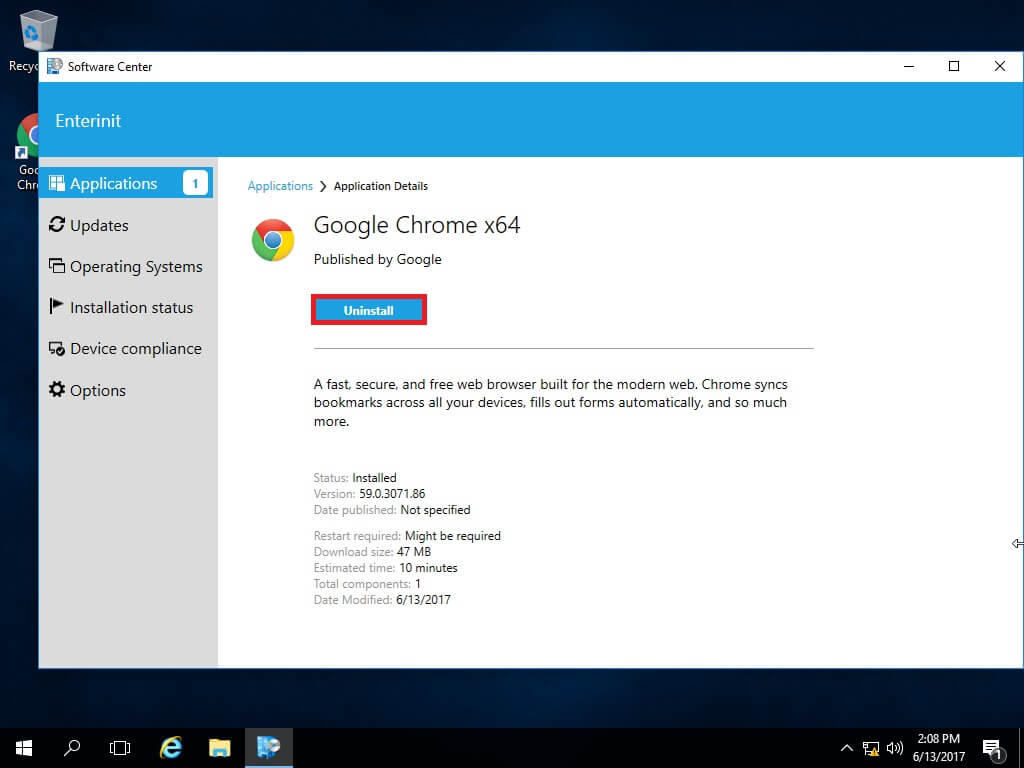
3. The client successfully installed it, so let’s uninstall it. Click Uninstall;