
How to Create a Virtual Machine in Windows 10 using Hyper-V Manager, PowerShell, and Quick Create.
Create a Virtual Machine with a Hyper-V Manager console
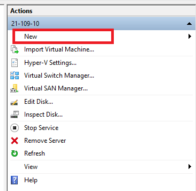
1. Start your Hyper-V Manager Console and click Nauja;
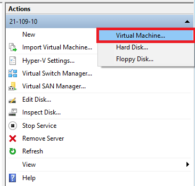
2. In the drop-down list select Virtual Machine;
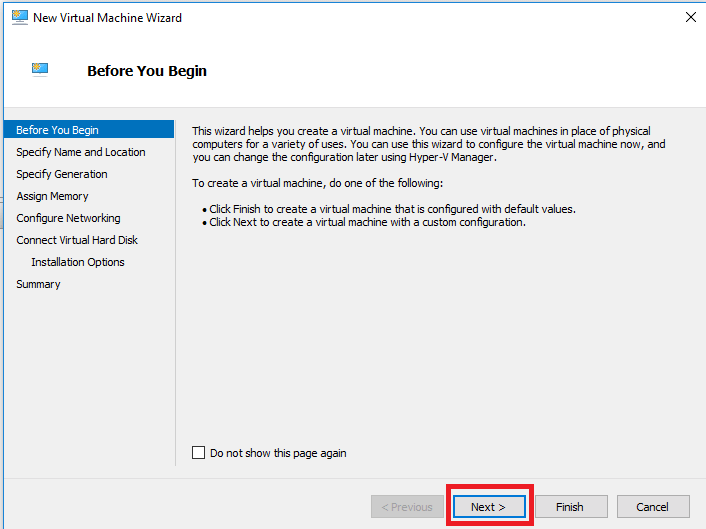
3. In the new window press Kitas;
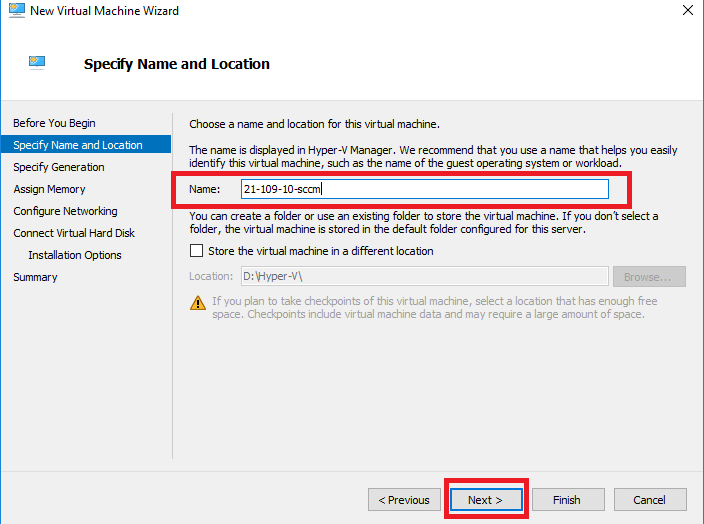
4. Enter the name of your VM, in my case 21-109-10-sccm.
PASTABA: At this stage, you may change the folder in which vm config files store. Or use default settings as I.
Spustelėkite Kitas;
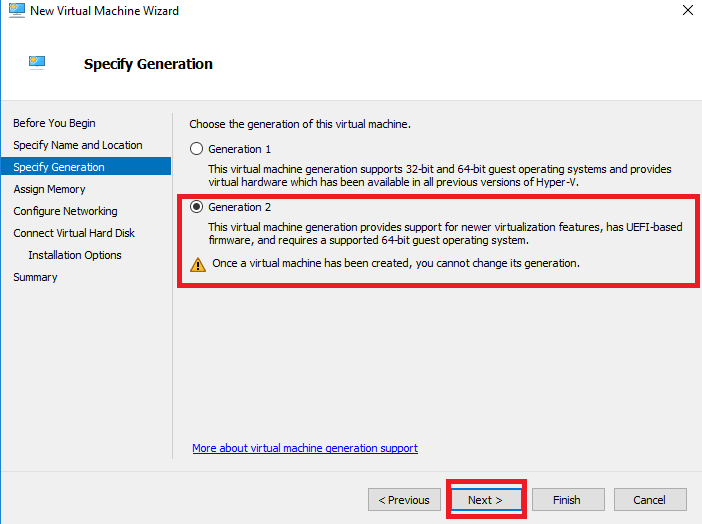
5. Pasirinkite Generation of your VM. (for old Windows, Linux better to use Generation 1). I use Generation 2. Spustelėkite Kitas;
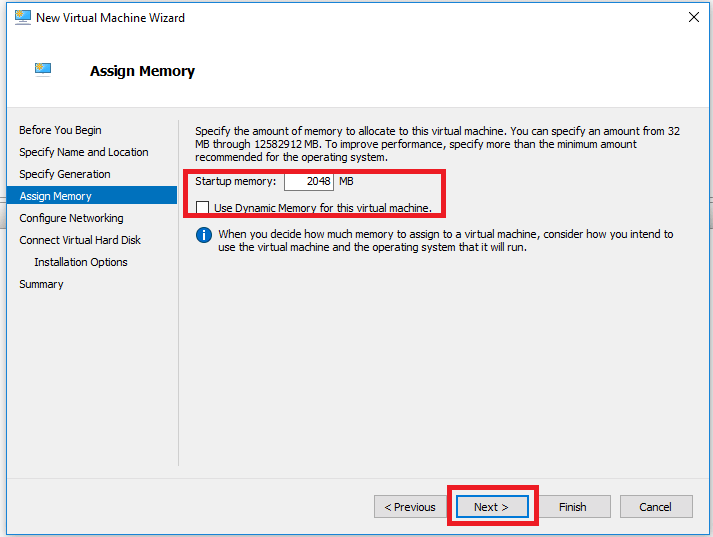
6. Enter the memory size for your VM. (You may set Use Dynamic Memory for this machine). Spustelėkite Kitas;
7. Select an early-prepared network connection. In this deployment, I use External. Spustelėkite Kitas;

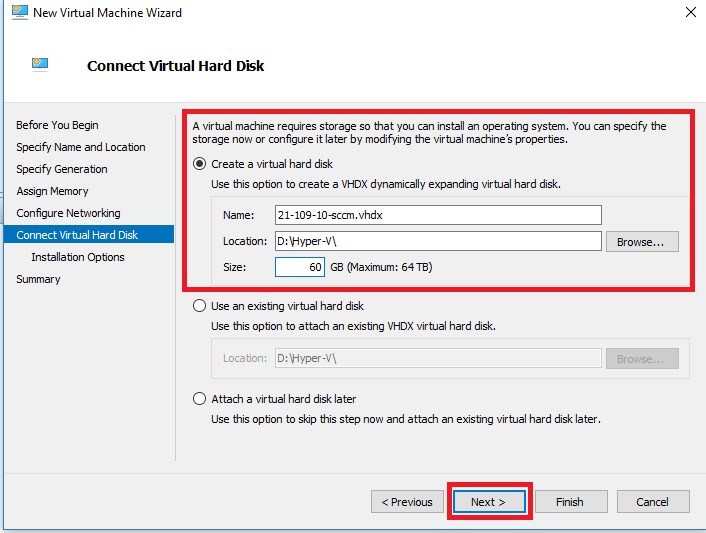
8. Create new one, use existing VHD(X), or select Attach a virtual hard disk later (to attach later). My VM Generation 2, so it uses VHDX format. Spustelėkite Kitas;
9. Select from where you installed Operating System to VM or select Install an operating system later. I use prepared *.iso of Windows 10 1607 x64 EN, stored in folder D:\ISO. Spustelėkite Kitas;

10. Check summary information and click Baigti;
11. Our VM was created!
But don’t hurry run it. You can do more in-depth configuration.
Create a Virtual Machine with Windows PowerShell
If you want to build a large-scale virtual environment with multiple VMs running at the same time, PowerShell is the tool to choose.
1. Bėk Windows PowerShell (Admin).
2. Run the following script:
New-VM -Name <Name> -Path <Path> -NewVHDPath <VHDPath> NewVHDSizeBytes <Memory> -Generation <Generation> -MemoryStartupBytes <Memory> -SwitchName <SwitchName>3. Check in Hyper-V Manager to verify whether the VM has been created.
The PowerShell script can be extended by including additional configuration options. For example, you can set up the VM memory by including the following cmdlets:
Set-VM -Name <Name> -ProcessorCount <Number of Processors> -DynamicMemory -MemoryMinimumBytes <Memory> -MemoryStartupBytes <Memory> -MemoryMaximumBytes <Memory>To explore other PowerShell cmdlets and how they can help in managing a virtual environment, run this command:
Get-Command -Module hyper-v | Out-GridViewYou will see a list of all PowerShell commands, which you can include in your script.
Create a Virtual Machine with Hyper-V Quick Create
Hiper-V Quick Create was specifically designed to make the process of creating VMs even easier and faster, as it can be completed in just a few clicks.
1. Atviras Hyper-V Quick Create;
2. Select an OS from the list on the left, or install a guest OS from an ISO image file (.iso) or a VHD file (.vhd or .vhdx) by clicking Local installation source;
3. Spustelėkite Change Installation Source and select the required file. The Secure Boot option can be checked only if the VM will run Windows;
4. Spustelėkite More options in the lower right corner;
5. Type the name of the VM;
6. Choose the virtual switch;
4. Spustelėkite Create Virtual Machine to start the process.


