
How to Install DNS Role on Windows Server 2016. Continuing preparing System Center LAB. In this post, we install Domain Name System (DNS) role in our future Domain Controller 'DCSC” (early created VM “DCSCCM” that I renamed) 'Virtual machine” (VM) with Microsoft Windows Server 2016 Standard.
1. For role installation I use the Server Manager troosten. Standaard, it starts automatically at logon. If the console doesn’t open, you may start in manually. Left Mouse Button click the Begin button and then click “Server Manager” or use search;

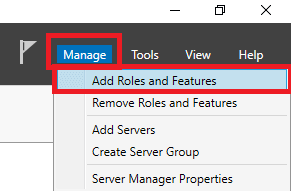
2. When the console opened click Manage (upper menu) and select from the list Add Roles and Features;
3. In a new window read the text and, if it’s all in a good state, click the Volgende knop;
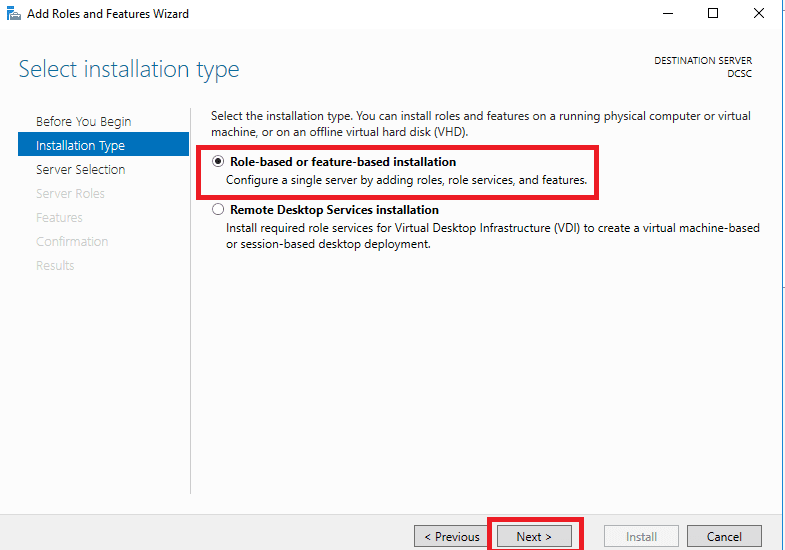
4. Selecteer (selected by Default) 'Role-based or feature-based installation” and click the Volgende knop;
5. Select the target server or (if it’s only one) click the Volgende knop;
6. Set check mark at “DNS Server';

7. In pop-up windows click the Add Features knop (DNS Tools for management DNS role);
8. After that click the Volgende knop;

9. Now we don’t install any feature, so click the Volgende knop;
10. Read short information about DNS and click the “Volgende” button;
11. If you wish, you may set the check mark at “Restart the destination server automatically if required” (by standard deployment there is no restart) and click “Installeren';

12. All good, installation start;
13. After installation is complete click the “Close” button. On the left side of the Server Manager console you will see the new option “DNS';


")


