
How to Fix Large File Upload Error 404 on IIS | Guia passo a passo. The following error occurs when uploading large files to the website.
Server Error
404 – File or directory not found.
The resource you are looking for might have been removed, had its name changed, or is temporarily unavailable.
To enable uploading large files you have to change a setting in IIS.
OBSERVAÇÃO: The limit is approximately 28,6 MB because the limit of maxAllowedContent Length é 30000000 bytes.
To change the maximum upload setting, named “maxAllowedContent Length”, faça o seguinte:
1. Log on to the server that holds the IIS website, and then click Começar, clique Programs, clique Ferramentas Administrativas, clique Internet Information Services (IIS) Gerente;
2. Expand the website that you want to increase the maxAllowedContent Length;
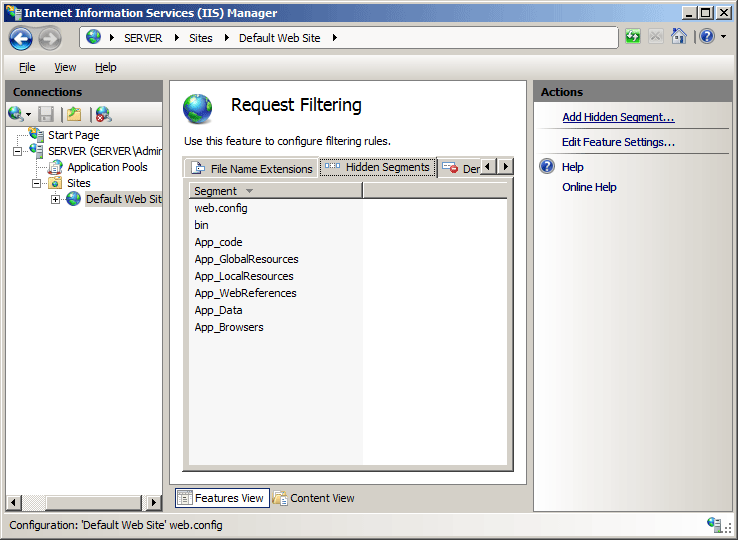
3. Double-click the Request Filtering icon in the main window
OBSERVAÇÃO: if you don’t have the Request Filtering icon, you need to install it through the Add Roles opção. Get the instructions below.
4. Click the Hidden Segment Tab;
5. Right-click web.config e clique Edit Feature Setting;
6. A new window named Edit Request Filtering Settings appears;
7. Sob Request Limits heading. enter a new larger value in the Maximum allowed content length (Bytes) caixa;
8. Clique OK to apply the change.
Setup Request Filtering
The default installation of IIS 7 and later includes the Request Filtering role service or feature. If the Request Filtering role service or feature is uninstalled, you can reinstall it using the following steps.
Servidor Windows 2012 R2
1. On the taskbar, clique Gerenciador de servidores.
2. Em Gerenciador de servidores, click the Gerenciar menu and then click Adicionar funções e recursos.
3. In the Adicionar funções e recursos wizard, clique Próximo. Select the installation type and click Próximo. Select the destination server and click Próximo.
4. On the Funções de servidor page, expandir Servidor da web (IIS), expandir Servidor da web, expandir Segurança, e depois selecione Request Filtering. Clique Próximo.

5. On the Select features page, clique Próximo.
6. On the Confirm installation selections page, clique Instalar.
7. On the Resultados page, clique Fechar.
How To
Note for IIS 7.0 users: Some of the steps in this section may require that you install the Microsoft Administration Pack for IIS 7.0, which includes a user interface for request filtering. To install the Microsoft Administration Pack for IIS 7.0, please see the following URL iis.net/expand/AdministrationPack
How to add a hidden segment
- Abrir Internet Information Services (IIS) Gerente:
- If you are using Windows Server 2012 or Windows Server 2012 R2:
- On the taskbar, clique Gerenciador de servidores, clique Ferramentas, and then click Internet Information Services (IIS) Gerente.
- If you are using Windows 8 or Windows 8.1:
- Hold down the Windows chave, press the letter X, and then click Painel de controle.
- Clique Ferramentas Administrativas, and then double-click Internet Information Services (IIS) Gerente.
- If you are using Windows Server 2008 or Windows Server 2008 R2:
- On the taskbar, clique Começar, point to Ferramentas Administrativas, and then click Internet Information Services (IIS) Gerente.
- If you are using Windows Vista or Windows 7:
- On the taskbar, clique Começar, and then click Painel de controle.
- Double-click Ferramentas Administrativas, and then double-click Internet Information Services (IIS) Gerente.
- If you are using Windows Server 2012 or Windows Server 2012 R2:
- In the Connections pane, go to the connection, site, application, or directory for which you want to modify your request filtering settings.
- In the Lar pane, double-click Request Filtering.
- In the Request Filtering pane, click the Hidden Segments aba, and then click Add Hidden Segment… in the Actions pane.
- In the Add Hidden Segment caixa de diálogo, enter the relative path that you want to hide, and then click OK.


")


