
Step-by-Step Guide to Install Configuration Manager on a Separate Server. We prepare all servers and install all requirements.
1. Mount “DVD” or “*.iso” with SCCM installation files (I am using SCCM Build 1606). Run autorun.
2. Click “Install“;
3. Click the “Next” button;
4. Select “Install a Configuration Manager primary site” and uncheck “Use typical installation options for a stand-alone primary site“. Click the “Next” button;
5. Enter your “License Key” select the option “Current Branch“, and click the “Next” button. In my case I use the option “Install the evaluation edition of this product“;
6. Read all behind links and set check marks. Click the “Next” button;
7. If your server has an Internet connection choose the option “Download required files” and select the target folder (“Browse” button). In my case, there is no Internet connection, so I download files on another machine and copy them to my server. Click the “Next” button;
8. If you choose “Download…” then you see the downloading process, in my case, it’s the verification process (I choose the second option in step “7“);
9. Select your languages for SCCM Console and reports (I use only “English“). Click the “Next” button;
10. Select “Client Language” and click the “Next” button;
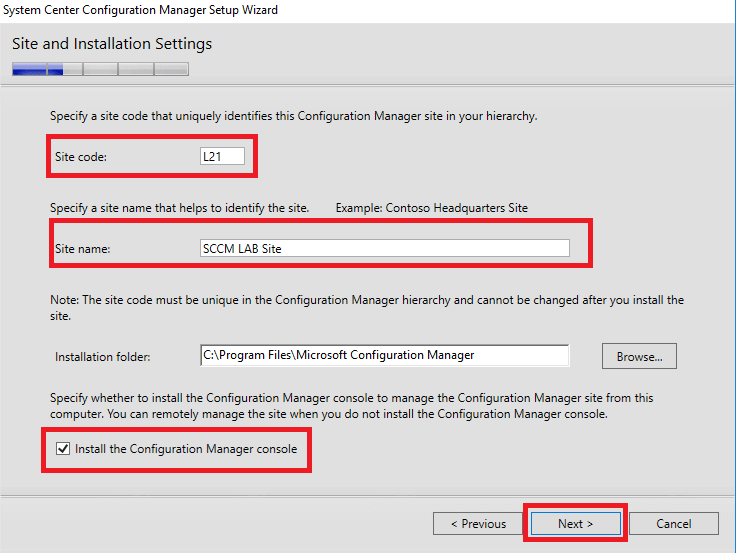
11. Enter your “Site code” (for the identification server in the hierarchy). Enter “Site name“. Don’t forget to set the check mark on “Install the Configuration Manager console“. Click the “Next” button;
12. If you don’t have an existing SCCM hierarchy select the option “Install the primary site as a stand-alone site“. Click the “Next” button;
13. Read the pop-up window and click the “Yes” button;
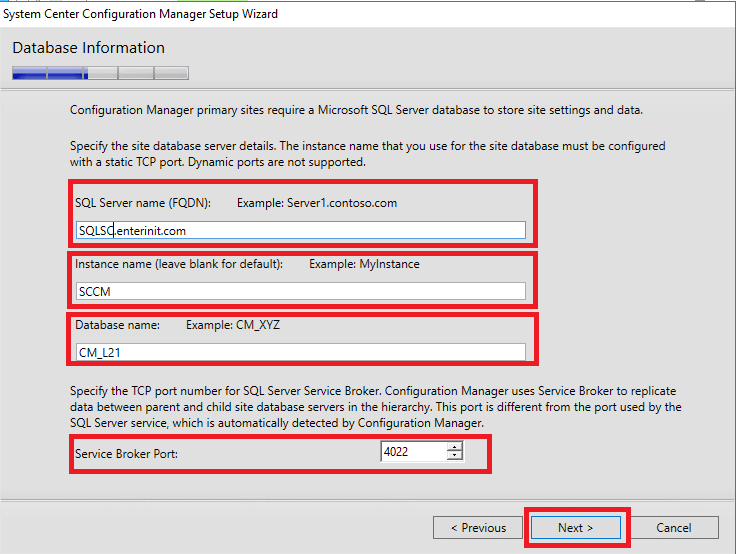
14. Enter your “SQL Server name (FQDN)“, “Instance name“, and “Database name“. You may change the “Service Broker Port” (this is not the same port for SCCM communication with SQL, as an example, I use 14331 as an SQL communication port). Click the “Next” button;
15. Select the path for your “SQL Server Data and Logs” (it’s set up automatically from your SQL installation). Click the “Next” button;
16. Leave the default server for “SMS Provider” (server where you make installation). Click the “Next” button;
17. Choose the option “Configure the communication method on each site system role“. (If you have “PKI Infrastructure” select the first option). Click the “Next” button;
18. Select points for installation and if you have PKI select “Client connection – HTTPS“, if not have PKI – “Client connection – HTTP“. Click the “Next” button;
19. Click the “Next” button;
20. Select the option “Yes, let’s get connected (recommended)” for getting SCCM updates. Click the “Next” button;
21. Check summary information and click the “Next” button;
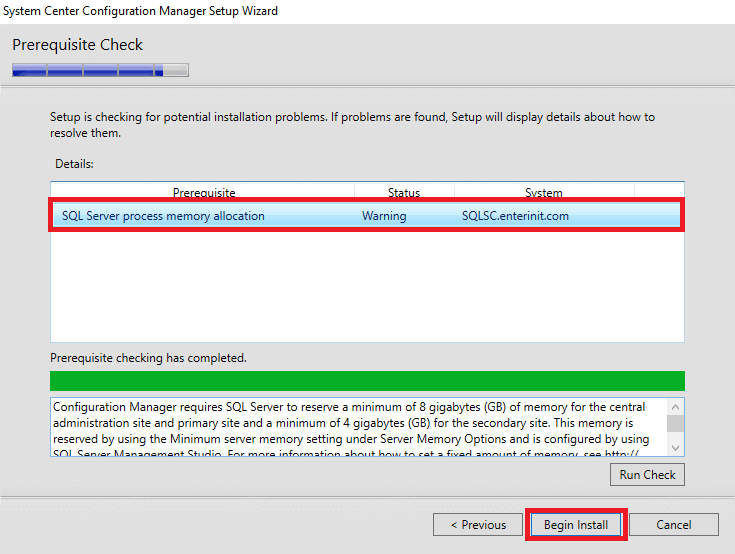
22. Starts prerequisite check;
23. In my case there “Warning” message on “SQL Server process memory allocation” (I give SQL Server only 3 Gb memory). Click the “Begin Install” button;
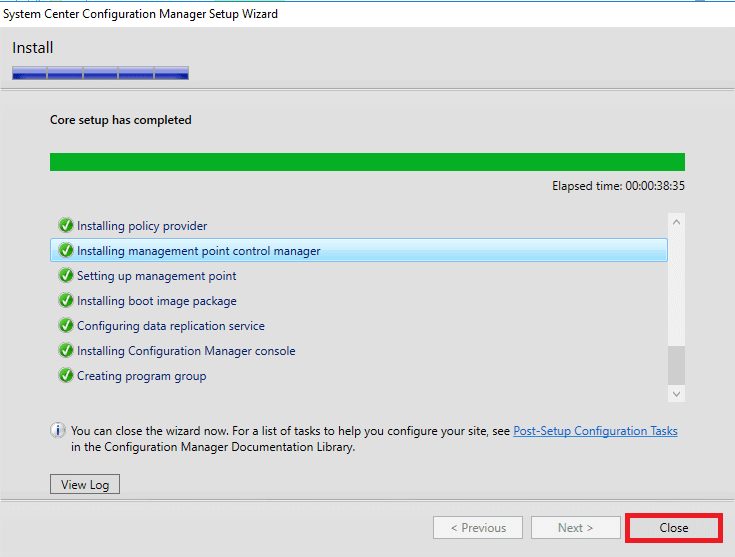
24. Starts installation process;
25. After installation check that all components are green and click the “Close” button.
26. Open your apps list and find “Configuration Manager Console”;
27. Run Configuration Manager Console to ensure that everything works;
CONGRATULATIONS!


")


