Windows Server 2016 DHCP Role Installation with GUI and PowerShell: Trin-for-trin-guide.
Dynamic Host Configuration Protocol (DHCP) is a client/server protocol that automatically provides an Internet Protocol (IP) host with its IP address and other related configuration information such as the subnet mask and default gateway. RFCs 2131 og 2132 define DHCP as an Internet Engineering Task Force (IETF) standard based on Bootstrap Protocol (BOOTP), a protocol with which DHCP shares many implementation details. DHCP allows hosts to obtain required TCP/IP configuration information from a DHCP server.
With GUI:
1. Start your system, when Server Manager opens click Add roles and features;
2. For Installation Type, click Next;
3. For Server Selection, select your server and click Next;
4. For Server Roles, vælge DHCP Server role;
5. In the pop-up window click Add Features;
6. Klik Next;
7. For Features, click Next;
8. For DHCP Server, click Next;
9. For Confirmation, click Install;
10. Installation begins;
11. When complete, click Tæt;
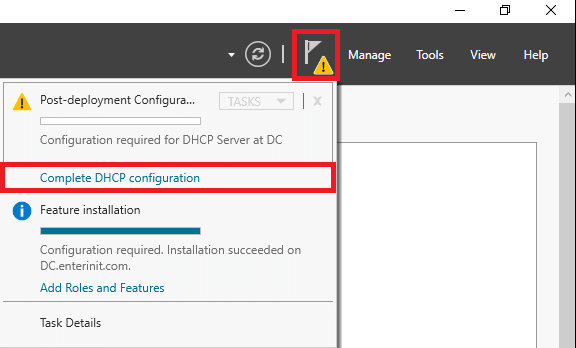
12. Klik de yellow triangle in Server Manager, og klik Complete DHCP configuration;
13. For Description, click Next;
14. For Authorization, click Commit (also you may select the option Skip AD authorization and do authorization from DHCP console);
15. For Summary, click Tæt (you must see Færdig twice);
16. Run de DHCP console from the apps list;
With PowerShell:
- Run PowerShell as administrator;
2. Install DHCP Role;
Add-WindowsFeature DHCP3. Install DHCP console;
Add-WindowsFeature RSAT-DHCP4. For DHCP authorization enter;
Add-DHCPServerInDC5. After that go to Server Manager. Klik de yellow triangle, and click Complete DHCP configuration. For Description, click Next. For Authorization, select the option Skip AD authorization and click Commit;
6. Get all commands for DHCP in PowerShell;
Import-Module dhcpserverGet-Command -Module dhcpserver


")


