Master .NET Framework 3.5 Deployment in Configuration Manager. Before we begin, download the net 3.5 cab file and copy it into the folder (where you place content for Configuration Manager).
Create a Configuration Manager application
1. Start the Configuration Manager console and navigate to Software Library\Application Management\Applications. Click Create Application;
2. Select Manually specify the application information and click Next;
3. Fill in the fields and click Next;
4. Fill in the fields, add Icon;
5. Click Next;
6. For Deployment Types, click Add;
7. At Type select Script Installer, select Manually specify the application information and click Next;
8. Fill in fields and click Next;
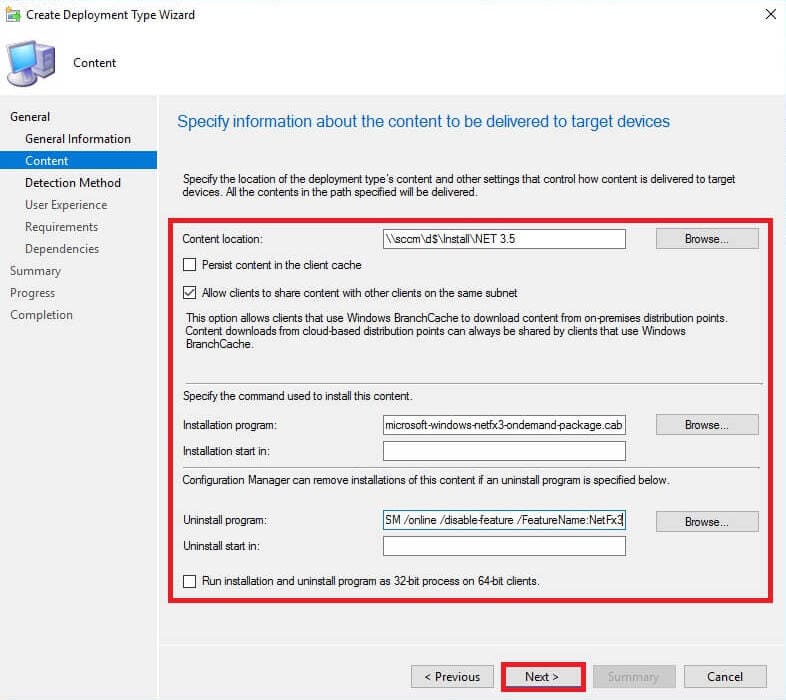
9. Select Content-Location. For Installation program use:
dism /online /add-package /packagepath:microsoft-windows-netfx3-ondemand-package.cabFor Uninstall program use:
DISM /online /disable-feature /FeatureName:NetFx310. Click Next;

11. Click Add Clause, and set Registry. At Hive select HKEY_LOCAL_MACHINE.
For Key use:
SOFTWARE\Microsoft\NET Framework Setup\NDP\v3.5For Value enter Install, for Data Type select String. Click OK;

12. Click Next;
13. Specify user experience settings for the application and click Summary;

14. Click Next;
15. Click Close;
16. Deployment type added, click Next;
17. Click Next;
18. Click Close;
Distribute Content and Deploy
- Right Mouse Button click on the newly added application and select Distribute Content;
2. Click Next;
3. Click Next;
4. Add Distribution Point and click Next;
5. Click Next;
6. Click Close;
7. Wait some time, refresh the page and you must get Content Status – Success;
8. Right Mouse Button click on the newly added application and select Deploy;
9. Select the target collection and click Next;
10. Click Next (We already sent it to Distribution Point);
11. Specify Deployment Settings and click Next;
12. Specify Scheduling and click Next;
13. Specify User Notifications and click Next;
14. Specify Alerts and click Next;
15. Click Next;
16. Click Close;
We complete the SCCM side, let’s check how it works at the client.
Install .NET Framework 3.5 from the Software Center
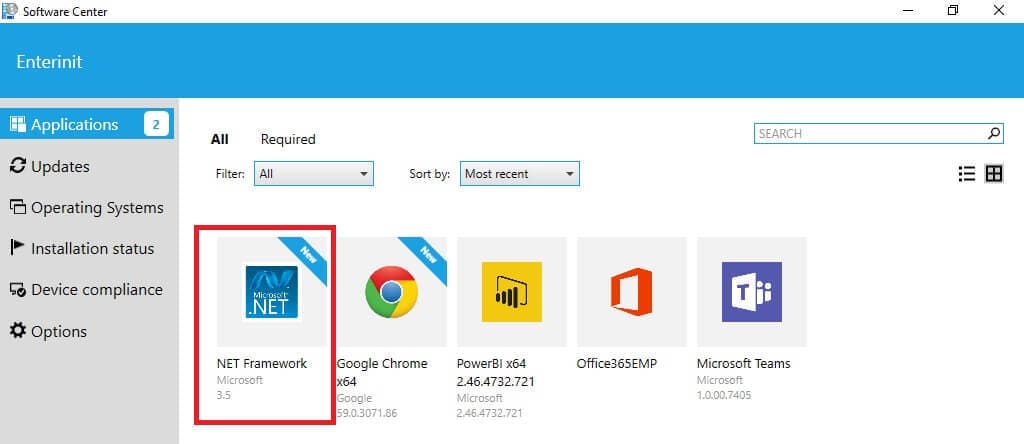
1. Log in to the client and start Software Center. You must see a new application;

2. Click Install and wait some time;
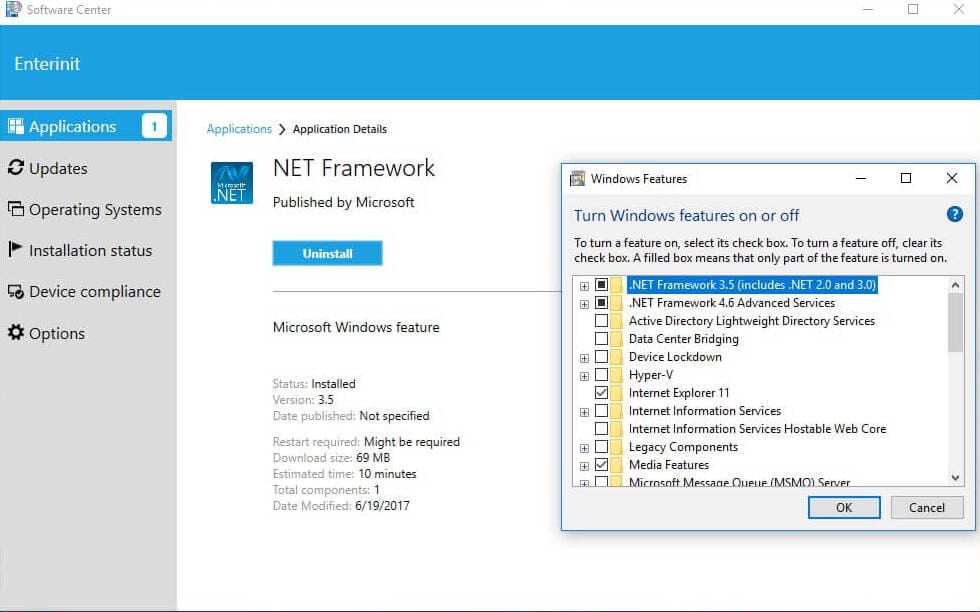
3. Client successfully installed it, so let’s uninstall it. Click Uninstall;

4. Uninstall completed and you can install it again if you wish;


Great post and thanks for the icon also unfortunately I an getting an error code 3 – file cannot be found.
Doesn’t the installation program have to include the path to the .cab file so it knows where it is?
dism /Online /Add-Package /PackagePath:%~dp0microsoft-windows-netfx3-ondemand-package
hi, is this works on windows 10 1909
Hi. This works with 1909 but you must use .Net3.5 cab file for windows 1909 (can be founded in 1909 iso).
It doesn’t work on 1909+, installation progress looks fine, but after “Success” .NET 3.5 check mark in Windows Features is stay empty.
Are you use .Net distro from 1909+ build? It’s better to use the same build and language.
Do you need internet access to Windows Update site for this to work or is this an offline install of .NET 3.5 Framework from the CAB file?
Hi, no, you don’t need internet access for this, you use distro from .cab file
Hi, check app deployment settings, especially “programs” tag “installation starts in” field
This worked for us, thanks! (Windows 10 v21H2)