How to Install System Center Orchestrator 2016: Step-by-Step Guide.
Preparing
Before we begin the installation process, please check all SCORCH requirements:
The minimum hardware & software:
- Windows సర్వర్ 2012, 2012 R2, 2016 (Desktop Experience)
- 2 GB of RAM.
- 200MB of disk space
- 2.1GHz dual-core CPU or faster
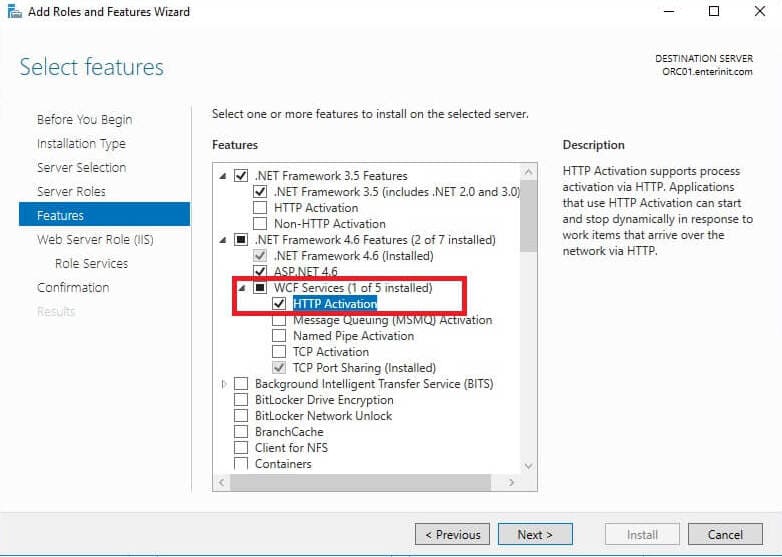
Windows Features:
- IIS – the setup will enable this feature if not already installed
- Microsoft .NET 3.5 SP1
- WCF Services – HTTP Activation
SQL సర్వర్:
- SQL Server Standard or Enterprise:
- 2012 SP2
- 2014
- 2014 SP1
- 2016
- Collation: SQL_Latin1_General_CP1_CI_AS
Active Directory
- orcsvc – A service account to run all the Orchestrator components.
- ORC Admins – A security group with all your Orchestrator administrators.
Firewall:
Since we’re installing all components (except the SQL Server) on the same server we only need to open the following port (I use 14332 from SQL Installation):
| Source | Destination | Port |
|---|---|---|
| Orchestrator Server | SQL సర్వర్ | TCP: 14332 |
If you’re planning on accessing the Orchestrator Console for other servers/PCs you will also need to open the following ports:
| Source | Destination | Port |
|---|---|---|
| Client | Orchestrator Server | TCP: 81, 82 |
Other:
- Silverlight 4 లేదా 5 is required to view the Orchestrator Console.
Installation
1. Start Installation
2. క్లిక్ చేయండి ఇన్స్టాల్ చేయండి;
3. Enter some information (and key, if you have it), క్లిక్ చేయండి తరువాత;
4. Read and accept license terms, క్లిక్ చేయండి తరువాత;
5. క్లిక్ చేయండి తరువాత;
6. Select desired features, క్లిక్ చేయండి తరువాత;

7. Enter your service account info, and click Test, if you see a green icon – క్లిక్ చేయండి తరువాత;
8. Enter SQL Server configuration, మరియు క్లిక్ చేయండి Test Database Connection, if you see a green icon – క్లిక్ చేయండి తరువాత;

9. Enter new database name or choose an existing database, క్లిక్ చేయండి తరువాత;
10. Select Active Directory groups to grant access to SCORCH, క్లిక్ చేయండి తరువాత;
11. If you need, change ports, క్లిక్ చేయండి తరువాత;

12. క్లిక్ చేయండి తరువాత;
13. If you wish, you can enable Updates, క్లిక్ చేయండి తరువాత;
14. If you wish, you can participate in error reporting, click Next;
15. Check all your configuration and click ఇన్స్టాల్ చేయండి;
16. Installation starts;
17. When complete, క్లిక్ చేయండి దగ్గరగా;
18. Check installed features (This is normal that you see version 2012, in fact, we have 2016)

Also, you can download Integration Packs for Orchestrator 2016.