Guide to Installing SCCM Requirements: SQL Configuration, Active Directory Schema Extending and Windows Server Roles Installation.
SQL Configuration
For normal work, you must use the next memory size for SCCM SQL:
- Minimum 8192 for “Primary Site“;
- Minimum 4096 for “Secondary Site“;
When you use a database server that is co-located with the site server, dedicate 50 percent of the available addressable system memory for SQL Server.
When you use a dedicated SQL Server, dedicate 80 percent of the available addressable system memory for SQL Server.
Configuration Manager requires SQL Server to reserve a minimum of 8 gigabytes (GB) of memory in the buffer pool used by an instance of SQL Server for the central administration site and primary site and a minimum of 4 gigabytes (GB) for the secondary site. This memory is reserved by using the Minimum server memory setting under Server Memory Options and is configured by using SQL Server Management Studio.”
Technet
In my case, I have very weak SQL, so I only show where and how to set these limits.
1. Run “Microsoft SQL Server Management Studio“;
2. Connect to your “SCCM Instance”. Enter “Server Name” and click the “Connect” button;
3. Права кнопка миші click on the instance and select “Властивості“;
4. Go to “Memory” and set “Minimum server memory (in MB)” and “Maximum server memory (in MB)” according to the information I wrote earlier. Click the “добре” button;

5. To apply these changes you must restart instance services, you can do it from “Microsoft SQL Server Management Studio“. Права кнопка миші click on the instance and select “Restart“;
6. Click “Yes” on pop-up windows;
Active Directory schema extending
When you extend the Active Directory schema for System Center 2012 Менеджер конфігурації, you can publish site information to Active Directory Domain Services. Extending the Active Directory schema is optional for Configuration Manager. Проте, by extending the schema you can use all Configuration Manager features and functionality with the least amount of administrative overhead.
If you decide to extend the Active Directory schema, you can do so before or after you run Configuration Manager Setup.
TechNe
1. Log in to your “Domain Controller Schema Master“. Mount “*.iso” with SCCM installation files. Go to “<drive letter>\SMSSETUP\BIN\X64” and run “extadsch.exe“;
2. After step “1” go to “C:\” and open “ExtADSch.log” if all is good you must see the next string;

3. Open your apps list and run “ADSI Edit“;

4. Права кнопка миші click on “ADSI Edit” and select “Connect to“;
5. Leave defaults and click the “добре” button;
6. Find “CN=System” in the list. Права кнопка миші click on “CN=System“, select “Новачок” and then “Object“;

7. In the list select “Container” and click the “Далі” button;

8. Enter “Значення” System Management and click the “Далі” button;
9. Click the “Finish” button;
10. Права кнопка миші click on “CN=System Management” and click “Властивості“;
11. Select “Security“;
12. Click the “Add” button;
13. In the “Object Types” add “Computers“, enter your SCCM server name, and click the “добре” button;

14. Set the checkmark “Full control” (like on the screenshot) and click the “добре” button;

Windows Server Roles and Features installation
My deployment scenario:
- SQL 2016 on Windows Server 2016 with separated disks (System, DB’s, Temp);
- SCCM 1606 on Windows Server 2016 with two disks (one for the system and one for data, like updates and apps)
1. Let’s make some tuning of our server. I need to host SCCM data on disk “D“. To do this we must create a blank file “NO_SMS_ON_DRIVE.SMS” in the root of disk “C“;

2. Make sure it is blank;
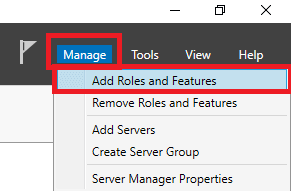
3. Next we need at Windows Server Roles and Features. In the “Менеджер сервера” in the upper menu click “Manage” and then “Add Roles and Features“;
4. Click the “Далі” button. (you may set the checkmark “Skip this page by default” and this window don’t appear next time);
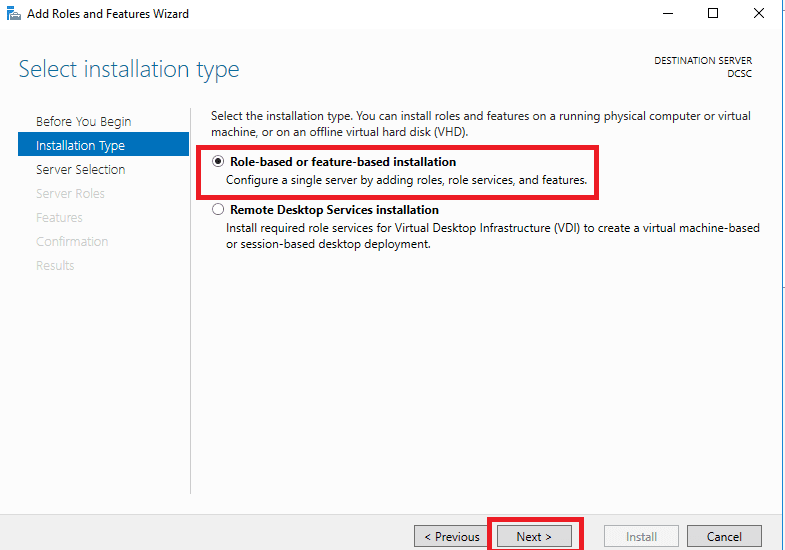
5. Leave by default “Role-based or feature-based installation” and click the “Далі” button;
6. Select the target server and click the “Далі” button (I have only one server);
7. Set a check mark on the “Web Server (IIS)” role, in the pop-up window click the “Add Features” button;
” role, in the pop-up window click the “Add Features” button;
8. Set the check mark on “Windows Server Update Services (WSUS)“, in the pop-up window click the “Add Features” button;

9. After all steps click the “Далі” button;
10. Set check mark on “.NET Framework 3.5 Features” and set check marks, like on the screenshot;

11. Set check mark on “Background Intelligent Transfer Service (BITS)“;

12. In the pop-up window click “Add Features“;
13. Set the check mark on “Remote Differential Compression” and click “Далі“;

ПРИМІТКА: I use Server 2016, if you use another Windows Server (2012 або 2012 R2) you must install WSUS 3.0 Service Pack 2.
14. Let’s configure “IIS Role“, and click the “Далі” button;
15. Set check marks, like on screenshots;


16. After all actions click the “Далі” button;
17. Let’s configure “WSUS Role“, and click the “Далі” button;
18. Set check marks on “WSUS Services“, I use the database on SCCM SQL Server, so I also set the checkmark “SQL Server Connectivity“. (If you want to use a local database for WSUS – don’t set the check mark on SQL and set the checkmark on “WID Connectivity“). Click the “Далі” button;

19. Set the checkmark and enter the path for storing updates (I use “D:\WSUS“). Click the “Далі” button;
20. Enter “<SQL Server name>\<Instance name>“, and click the “Check connection” button to check the connection. If all is good, click the “Далі” button;
ПРИМІТКА: I don’t have Internet access on this machine, so I need to specify the source path for feature installation (“.NET Framework 3.5“). Click “Specify an alternate source path“;

21. Enter “<windows source files DVD or *iso disk>\sources\sxs” and click “добре” button;
22. Click the “Install” button;
23. Installation starts;
24. When the installation is finished, click the “Закрити” button;
25. Click on the yellow triangle and then click “Launch Post-Installation tasks” (finish WSUS installation);

26. Post-installation finished;
27. If you install WSUS with SQL database, go to SQL Server. You will see “SUSDB” file and “SUSDB” database in “SQL Server Management Studio“;
Windows ADK installation
Download the installation file from Windows ADK Site. You may install it from the WEB or download files to install it on another computer. Let’s do both options.
2. If you choose the online installation. Run the downloaded file “adksetup.exe“. Select “Install the Windows Assessment and Deployment Kit – Windows 10 to this computer“. Click the “Далі” button;
3. Select “Yes” or “No” (read the text in the window to make choice). Click the “Далі” button;
4. Read “License Agreement” and click the “прийняти” button;
5. Select components required for SCCM successful installation, like in the screenshot. Click the “Install” button to start the installation.

6. If you choose the offline installation. Select a folder to download installation files and click the “Далі” button;
7. Copy downloaded files to the target machine and run “adksetup.exe“;
8. Click the “Далі” button;
9. Next repeat steps “3-5“;
10. In both variants at the end of installation click the “Close” button. (Also you may explore Windows ADK documentation on MSDN if you need, by setting a checkmark);
ПРИМІТКА: Don’t forget to reboot after installation. It takes a very long time to install.


")


