Guida all'installazione dei requisiti SCCM: Configurazione SQL, Estensione dello schema Active Directory e installazione dei ruoli Windows Server.
Configurazione SQL
Per il lavoro normale, è necessario utilizzare la dimensione di memoria successiva per SCCM SQL:
- Minimo 8192 per "Sito primario“;
- Minimo 4096 per "Sito secondario“;
Quando si utilizza un server di database che si trova nella stessa posizione del server del sito, dedicare 50 percentuale della memoria di sistema indirizzabile disponibile per SQL Server.
Quando si utilizza un SQL Server dedicato, dedicare 80 percentuale della memoria di sistema indirizzabile disponibile per SQL Server.
Configuration Manager richiede che SQL Server riservi almeno 8 gigabyte (GB) di memoria nel pool di buffer utilizzato da un'istanza di SQL Server per il sito di amministrazione centrale e il sito primario e un minimo di 4 gigabyte (GB) per il sito secondario. Questa memoria viene riservata utilizzando l'impostazione Memoria minima del server in Opzioni memoria server ed è configurata utilizzando SQL Server Management Studio."
Technet
Nel mio caso, Sono molto debole SQL, quindi mostro solo dove e come impostare questi limiti.
1. Esegui “Microsoft Studio di gestione di SQL Server“;
2. Connettiti alla tua "istanza SCCM". Accedere "Nome del server" e fare clic su "Collegarepulsante ";
3. Pulsante destro del mouse fare clic sull'istanza e selezionare "Proprietà“;
4. Vai a "Memoria” e impostare “Memoria minima del server (in MB)" E "Memoria massima del server (in MB)"secondo le informazioni che ho scritto in precedenza. Clicca il "OKpulsante ";

5. Per applicare queste modifiche è necessario riavviare i servizi dell'istanza, puoi farlo da “Microsoft Studio di gestione di SQL Server“. Pulsante destro del mouse fare clic sull'istanza e selezionare "Ricomincia“;
6. Fare clic su "SÌ"nelle finestre pop-up;
Estensione dello schema di Active Directory
Quando si estende lo schema di Active Directory per System Center 2012 Configuration Manager, è possibile pubblicare informazioni sul sito in Servizi di dominio Active Directory. L'estensione dello schema di Active Directory è facoltativa per Configuration Manager. Tuttavia, estendendo lo schema è possibile utilizzare tutte le caratteristiche e funzionalità di Configuration Manager con il minor carico amministrativo.
Se decidi di estendere lo schema di Active Directory, è possibile farlo prima o dopo aver eseguito l'installazione di Configuration Manager.
TechNe
1. Accedi al tuo “Master dello schema del controller di dominio“. Monte”*.iso" con i file di installazione di SCCM. Vai a "<lettera di unità>\SMSSETUPBINX64" e corri "extadsch.exe“;
2. Dopo il passaggio “1" vai a "C:\" e apri "ExtADSch.log"Se tutto va bene, devi vedere la stringa successiva;

3. Apri l'elenco delle app ed esegui "Modifica ADSI“;

4. Pulsante destro del mouse clicca su "Modifica ADSI" e seleziona "Connettiti a“;
5. Lasciare le impostazioni predefinite e fare clic su "OKpulsante ";
6. Trovare "CN=Sistema" nella lista. Pulsante destro del mouse clicca su "CN=Sistema“, Selezionare "Nuovo" poi "Oggetto“;

7. Nell'elenco selezionare "Contenitore" e fare clic su "Prossimopulsante ";

8. Accedere "Valore" Gestione del sistema e fare clic su "Prossimopulsante ";
9. Clicca il "Finepulsante ";
10. Pulsante destro del mouse clicca su "CN=Gestione del sistema" e fare clic su "Proprietà“;
11. Selezionare "Sicurezza“;
12. Clicca il "Aggiungerepulsante ";
13. Nel "Tipi di oggetti" aggiungere "Computer“, inserisci il nome del tuo server SCCM, e fare clic su "OKpulsante ";

14. Metti il segno di spunta su “Controllo completo” (come nello screenshot) e fare clic su "OKpulsante ";

Installazione di ruoli e funzionalità di Windows Server
Il mio scenario di distribuzione:
- SQL 2016 SU Server Windows 2016 con dischi separati (Sistema, DB, Temp);
- SCM 1606 SU Server Windows 2016 con due dischi (uno per il sistema e uno per i dati, come aggiornamenti e app)
1. Effettuiamo qualche messa a punto del nostro server. Ho bisogno di ospitare i dati SCCM sul disco "D". Per fare questo dobbiamo creare un file vuoto “NO_SMS_ON_DRIVE.SMS"nella radice del disco"C“;

2. Assicurati che sia vuoto;
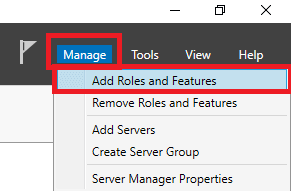
3. Successivamente abbiamo bisogno di Ruoli e funzionalità di Windows Server. Nel "Gestore del server"nel menu superiore fare clic su"Maneggio" poi "Aggiungi ruoli e funzionalità“;
4. Clicca il "Prossimopulsante ". (puoi impostare il segno di spunta “Salta questa pagina per impostazione predefinita" e questa finestra non verrà visualizzata la prossima volta);
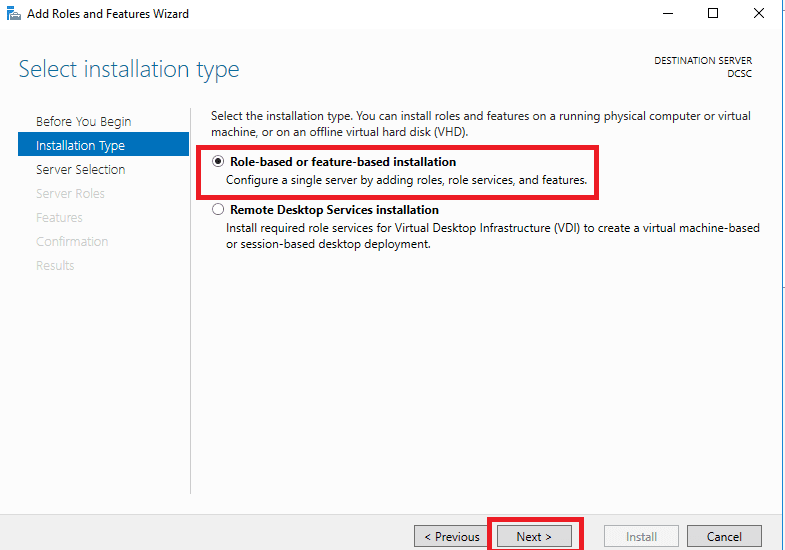
5. Lascia per impostazione predefinita "Installazione basata su ruoli o funzionalità" e fare clic su "Prossimopulsante ";
6. Selezionare il server di destinazione e fare clic su “Prossimopulsante " (Ho solo un server);
7. Metti un segno di spunta su “Server web (IIS)" ruolo, nella finestra pop-up fare clic su "Aggiungi funzionalitàpulsante ";
" ruolo, nella finestra pop-up fare clic su "Aggiungi funzionalitàpulsante ";
8. Metti il segno di spunta su “Windows Server Update Services (WSUS)“, nella finestra pop-up fare clic su "Aggiungi funzionalitàpulsante ";

9. Dopo tutti i passaggi, fai clic su "Prossimopulsante ";
10. Metti il segno di spunta su “.NETTO quadro 3.5 Caratteristiche" e imposta i segni di spunta, come nello screenshot;

11. Metti il segno di spunta su “Servizio di trasferimento intelligente in background (PEZZI)“;

12. Nella finestra pop-up fare clic su "Aggiungi funzionalità“;
13. Metti il segno di spunta su “Compressione differenziale remota" e fare clic su "Prossimo“;

NOTA: Io uso Server 2016, se usi un altro Windows Server (2012 O 2012 R2) devi installare WSUS 3.0 Pacchetto d'aggiornamento 2.
14. Configuriamo “Ruolo dell'IIS“, e fare clic su "Prossimopulsante ";
15. Imposta i segni di spunta, come negli screenshot;


16. Dopo tutte le azioni, fai clic su "Prossimopulsante ";
17. Configuriamo “Ruolo WSUS“, e fare clic su "Prossimopulsante ";
18. Metti i segni di spunta su “Servizi WSUS“, Utilizzo il database su SCCM SQL Server, quindi ho messo anche il segno di spunta “Connettività SQL Server“. (Se desideri utilizzare un database locale per WSUS, non impostare il segno di spunta su SQL e imposta il segno di spunta su "Connettività WID"). Clicca il "Prossimopulsante ";

19. Imposta il segno di spunta e inserisci il percorso per la memorizzazione degli aggiornamenti (Ero solito:\WSUS“). Clicca il "Prossimopulsante ";
20. Accedere "<Nome dell'SQL Server>\<Nome dell'istanza>“, e fare clic sul pulsante "Verifica connessione" per verificare la connessione. Se tutto va bene, clicca il "Prossimopulsante ";
NOTA: Non ho accesso a Internet su questa macchina, quindi ne ho bisogno specificare la percorso di origine per l'installazione delle funzionalità (".NET Framework 3.5"). Fai clic su "Specifica un percorso di origine alternativo";

21. Accedere "<file sorgente di Windows DVD o disco *iso>\fontisxs" e fare clic su "OKpulsante ";
22. Clicca il "Installarepulsante ";
23. Viene avviata l'installazione;
24. Al termine dell'installazione, clicca il "Vicinopulsante ";
25. Fare clic sul triangolo giallo e quindi fare clic su "Avvia le attività post-installazione" (terminare l'installazione di WSUS);

26. Post-installazione terminata;
27. Se installi WSUS con database SQL, vai a SQLServer. Vedrai "SUSDB"file e"SUSDB" banca dati in "Studio di gestione di SQL Server“;
Installazione dell'ADK di Windows
Scarica il file di installazione dal sito Windows ADK. Puoi installarlo dal WEB o scaricare file per installarlo su un altro computer. Facciamo entrambe le opzioni.
2. Se scegli il installazione in linea. Eseguire il file scaricato “adksetup.exe“. Seleziona "Installa Windows Assessment and Deployment Kit – Windows". 10 a questo computer". Clicca il "Prossimopulsante ";
3. Selezionare "SÌ" O "NO" (leggere il testo nella finestra per fare la scelta). Clicca il "Prossimopulsante ";
4. Leggere "Contratto di licenza" e fare clic su "Accettarepulsante ";
5. Seleziona i componenti richiesti per la corretta installazione di SCCM, come nello screenshot. Fare clic sul pulsante "Installa" per avviare l'installazione.

6. Se scegli il installazione offline. Selezionare una cartella per scaricare i file di installazione e fare clic su "Prossimopulsante ";
7. Copia i file scaricati sul computer di destinazione ed esegui “adksetup.exe“;
8. Clicca il "Prossimopulsante ";
9. Successivo ripetere i passaggi "3-5“;
10. In entrambe le varianti al termine dell'installazione cliccare sul pulsante “Chiudi”.. (Inoltre, se necessario, puoi esplorare la documentazione di Windows ADK su MSDN, impostando un segno di spunta);
NOTA: Non dimenticare di riavviare dopo l'installazione. Esso ci vuole molto tempo per farlo installare.