在Hyper-V Windows中使用VM的操作 10: 管理虚拟机的指南. Some useful info about what you can do with Virtual Machine (VM) in Hyper-V Manager.
1. Import Virtual Machine – you may import to your Hyper-V early exported VM;
2. 编辑磁盘 – edit selected Hyper-V Virtual Disk (as example);
3. 检查磁盘 – show short information about selected Hyper-V Virtual Disk;
- Run your Hyper-V Manager, 点击“检查磁盘“;

- 选择您的“虚拟磁盘”然后按“Open“;

- 检查信息,然后按“Close“.

4. 连接 – connect to selected Virtual Machine to work with it;
5. Setting - 打开VM设置;
6. 开始 - “”开机“ 机器 (如果VM在离开“ 状态);
7. 检查点 - 为VM创建新的检查点;
8. 移动 - 你可以 ”移动” VM文件和磁盘到另一个位置;
9. Export - 导出VM以未来在另一台服务器上导入;
最佳实践:
- 断开“虚拟磁盘”来自VM;
- 将其复制到另一台服务器的目标文件夹;
- “Export”您的VM;
- 转到另一台服务器并执行”Import Virtual Machine“;
- 连接您的早期复制”虚拟磁盘“ 和 ”开始” VM
10. 重命名 – rename the name of a VM in Hyper-V Manager (仅更改可见名称, NOT 文件夹或“虚拟磁盘“ 姓名);
- Run your Hyper-V manager and select “Virtual Machine“;
- Click “重命名”并输入新名称;
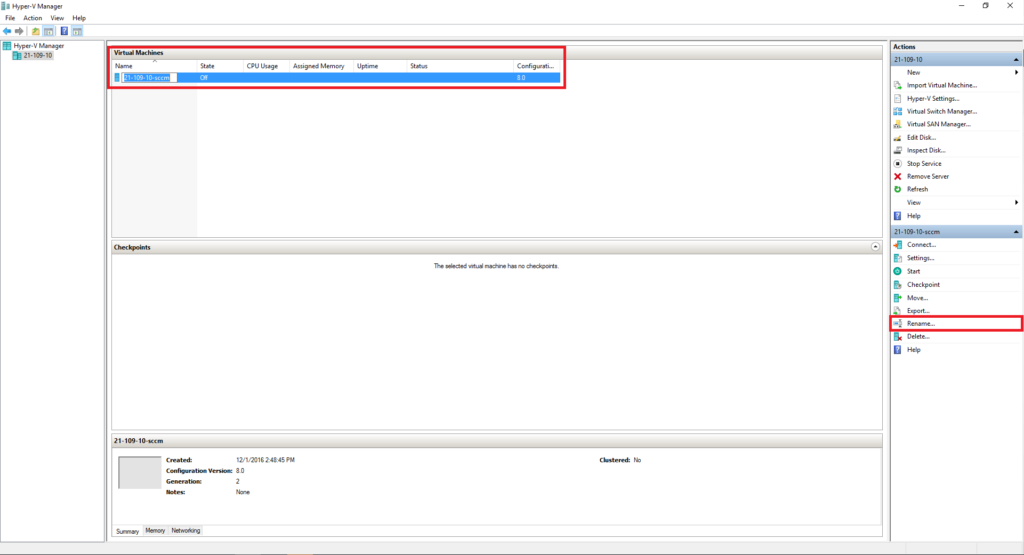
- 按 ”进入”在键盘上.
11. Delete – delete VM from Hyper-V manager and VMs configuration file (之后手动删除”虚拟磁盘“);
12. Help - 不需要介绍.


")


