Guía de configuración de métodos de descubrimiento de Configuration Manager | Tutorial paso a paso. En esta publicación, we config “Discovery Methods” in SCCM. "Discovery Methods” help you discover new computers and users in your infrastructure.
1. Start your SCCM Console and go to “Administration";
2. Ir a "Overview\Hierarchy Configuration\Discovery Methods";
3. First config “Active Directory Forest Discovery".
4. Select and click the button “Propiedades” or click Botón derecho del ratón and select “Propiedades";
5. Set the checkmark “Enable Active Directory Forest Discovery“. If you wish to create boundaries by AD sites – set a checkmark. If you wish to create IP address range boundaries – set a checkmark. Schedule “Run time” and click the “DE ACUERDO" botón;
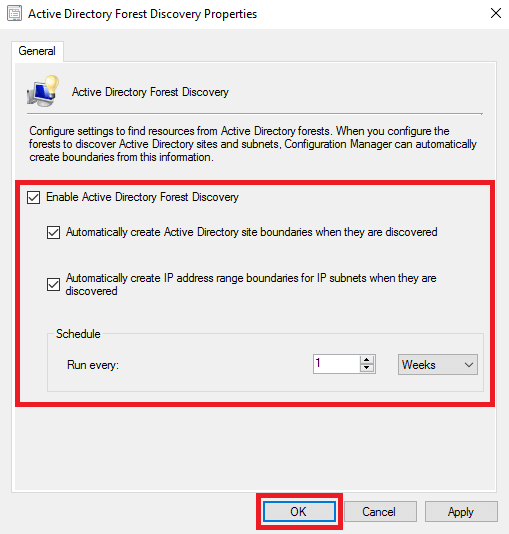
6. If you wish to start discovering now – click the “Sí” button in the pop-up window;
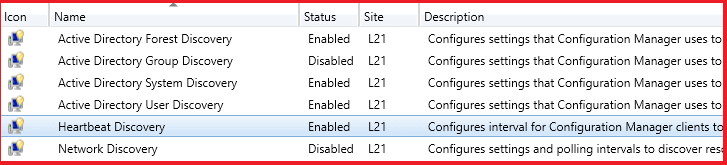
7. In my LAB and Enterprise deployment I don’t use “Active Directory Group Discovery", so I skip it;
8. Select and open properties (see step “4") para "Active Directory System Discovery";
9. Set the checkmark “Enable Active Directory System Discovery“. Click on the button to add an AD container (Ver captura de pantalla);
10. Haga clic en el "Navegar” button and select AD container for discovering. También, you may select more options for searching. Después de seleccionar, haga clic ""DE ACUERDO" botón;
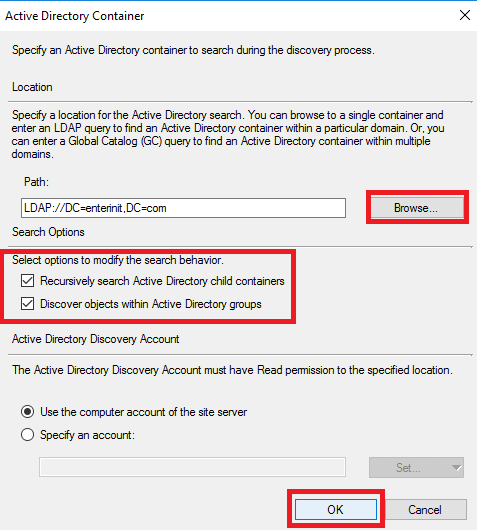
11. Ok, we add the AD container;
12. You can schedule “Full" y "Delta” discovery in the “Polling Schedule” bookmark;
13. También, you may add more attributes for importing to SCCM in the “Active Directory Attributes” bookmark;
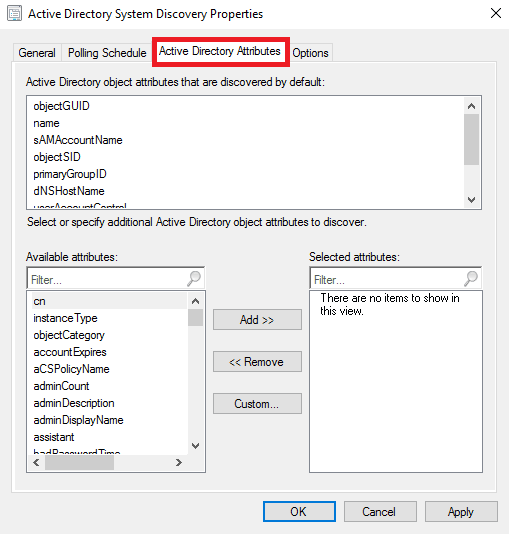
14. And config excluded options in the “Options” bookmark. When you finish – click the “DE ACUERDO" botón;
15. Select and open properties for “Active Directory User Discovery" (Botón derecho del ratón click and select “Propiedades" o "Propiedades” button in the upper menu);
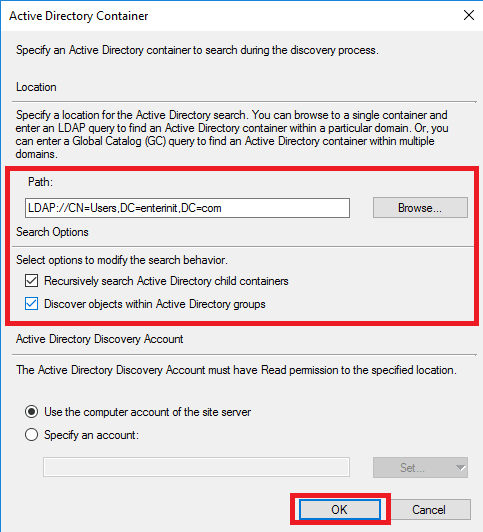
16. Set the checkmark “Enable Active Directory User Discovery” and add the AD container by clicking a button (Ver captura de pantalla);
17. Haga clic en el "Navegar” button and select the AD container. Add search options and click the “DE ACUERDO" botón;
18. Open the “Polling Schedule” bookmark. Config scheduling for “Full" y "Delta” discovering;
19. In the bookmark “Active Directory Attributes” you can add more attributes for importing to SCCM from AD. When finished click the “DE ACUERDO" botón;
20. En la ventana emergente, haga clic en el "Sí” button to run discovery as soon as possible;
21. I don’t use “Network Discovery", so I skip it;
22. Abierto "Heartbeat Discovery” properties;
23. Set checkmark “Enable Heartbeat Discovery” and config interval. When finished click the “DE ACUERDO" botón;

")


