A Step-by-Step Guide to Configuring DHCP on Windows Server 2016 Using GUI and PowerShell.
З графічним інтерфейсом
1. бігти в DHCP console зі списку програм. Перейдіть до IPv4\Server Options. There we config Server options for all scopes;
2. Права кнопка миші натисніть на Server Options і натисніть Configure Options;
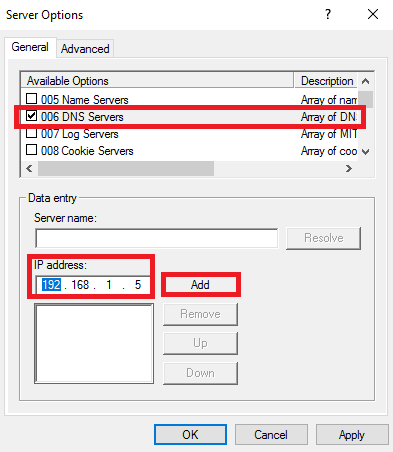
3. Select option 006 DNS Servers, введіть an IP address, і натисніть додати;
4. Select option 015 DNS Domain Name, enter the domain name, і натисніть в порядку;
5. New options added;
6. Права кнопка миші натисніть на IPv4 і натисніть New Scope;
7. Натисніть Далі;
8. Введіть Ім'я (and if you wish опис), і натисніть Далі;
9. Введіть the Start IP address, End IP address, і Subnet mask, і натисніть Далі;
10. On this page, you may exclude the IP range from DHCP. Натисніть Далі;
11. встановити Lease Duration і натисніть Далі;
12. You may select Так and configure Scope Options for this scope. я вибираю Немає, натисніть Далі;
13. Натисніть Закінчити;
14. Scope created, but we must Activate це;
15. Права кнопка миші click at the scope and click Activate;
16. Scope activated and worked!
17. If you Права кнопка миші натисніть на Leased IP Address, you may Add to the reservation Add to the filter, or even Видалити це;
З PowerShell
1. бігти PowerShell як адміністратор. To get active scopes enter:
Get-DhcpServerv4Scope -cn <dhcp server name> | select scopeid, name, description2. To add new scope, введіть:
Add-DhcpServerv4Scope -Name ‘<scope name>’ -StartRange <start IP Address> -EndRange <end IP Address> -SubnetMask <subnet mask> -Description ‘<description>’ –cn <dhcp server name>3. Before scope delete Кращі практики is run the command with WhatIf параметр:
Remove-DhcpServerv4Scope -ScopeId <scope id> -cn <dhcp server name> -WhatIf4. Then run without the WhatIf параметр:
Remove-DhcpServerv4Scope -ScopeId <scope id> -cn <dhcp server name>5. Scope removed.


